Case Report - Immediate Placement and Loading
Dr. Harald Fahrenholz – Zahnästhetik am Kohlmarkt
Curriculum vitae
Dr. Harald Fahrenholz was born in Königssee, Bavaria, at 19.11.1949 After his education at the University of Mainz he worked 25 years in his own office in Grünwald near Munich. Later he worked together with Prof. Rolf Ewers at the CMF Clinic in Vienna. Since 2007 he is working in his own office at the Zahnästhetik am Kohlmarkt. He was influenced by teachers like Dr. Peter Kraus, P. K. Thomas, Charles Stewart, Dr. Axel Bauer, Dr. Alexander Gutowski and Lorenzo Vanini. Subsequently in implantology Dr. Axel Kirsch, Prof. Per-Ingvar Brånemark, Prof. Ulf Lekholm (CTC Courses at the Brånemark Clinic, Gothenburg), Prof. Rolf Ewers, Dr. Johan Feith and Dr. Ulrich Volz
His main emphasis is the metal-free and biologic dentistry in implantology and prosthodontics.
Introduction
To evaluate the clinical performance of the system, I performed a retrospective evaluative study of my own patients be-tween 2009 and 2015, together with Dr Sofia Karapataki (Athens, Greece). The follow-up included 114 Patent implants. Our clinical survival rate was 97.6%; no fractures were reported for this period. Any cases of implant loss were related to bone augmentation, sinus floor eleva-tion or immediate implant placement. To date, I have placed 700 Patent implants and experienced only three fractures, all of them two-piece implants. By hind-sight, all failures were caused by incor-rect prosthetic design. Nor did we see any detachment or fracture of fiberglass abutments. These results correlate well with the reports by Becker et al. (2017) and Brüll.et al. (2014) [1, 2]. Both confirm the fa-vourable soft-tissue response, which Brüll et al. state even holds when com-pared to titanium implants. Our own re-sults confirm this: we have not seen any case of peri-implantitis associated with these implants. The retrospective study by Brüll et al. also reported good results with immediate implant placement.The present case report demonstrates how the Patent implant system can be applied in immediate placement and loading situations.
Dr. Harald Fahrenholz – Zahnästhetik am Kohlmarkt
Kohlmarkt 7/1/34, 1010 Vienna, Austria www.zahnaesthetik-wien.at
Telephone +43 664 9127454 h.fahrenholz@zahnaesthetik-wien.at
4. April 2020

Figure 1:
Initial situation, the fracture is not recognizable
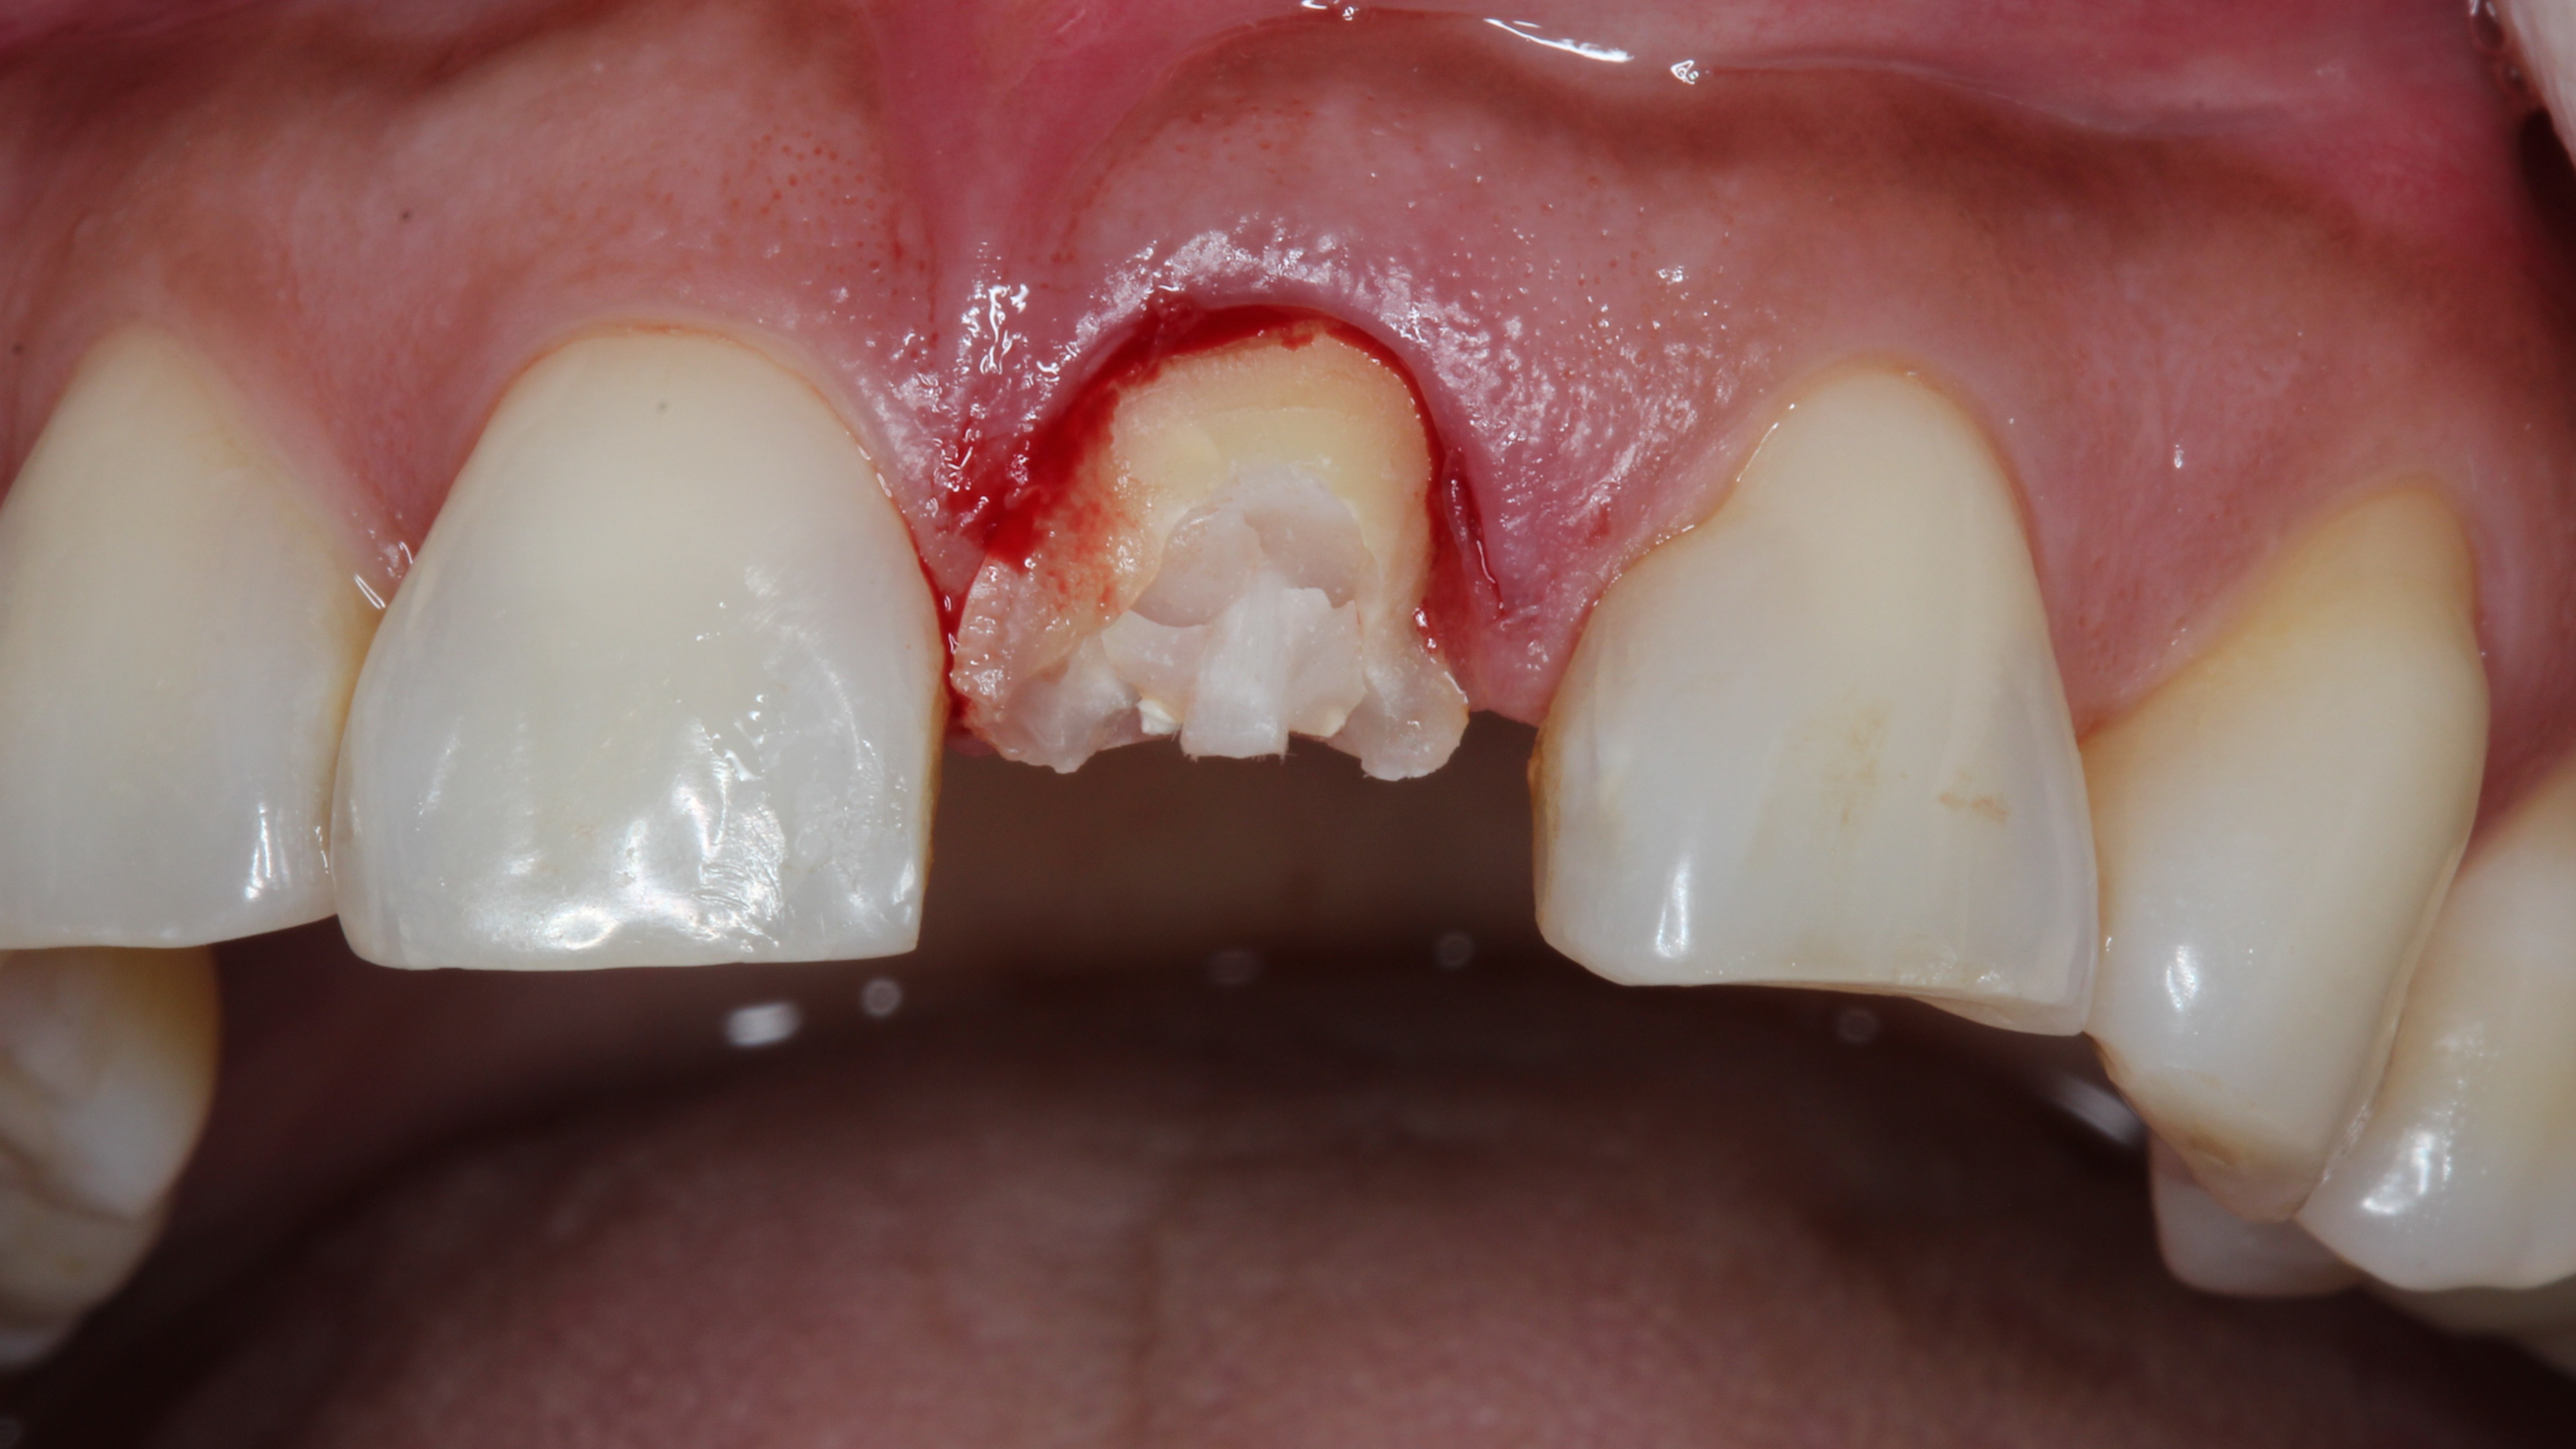
Figure 2:
Initial situation with the fractured tooth 21
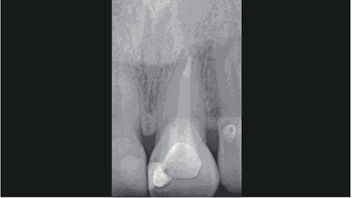
Figure 3:
Initial situation on x-ray
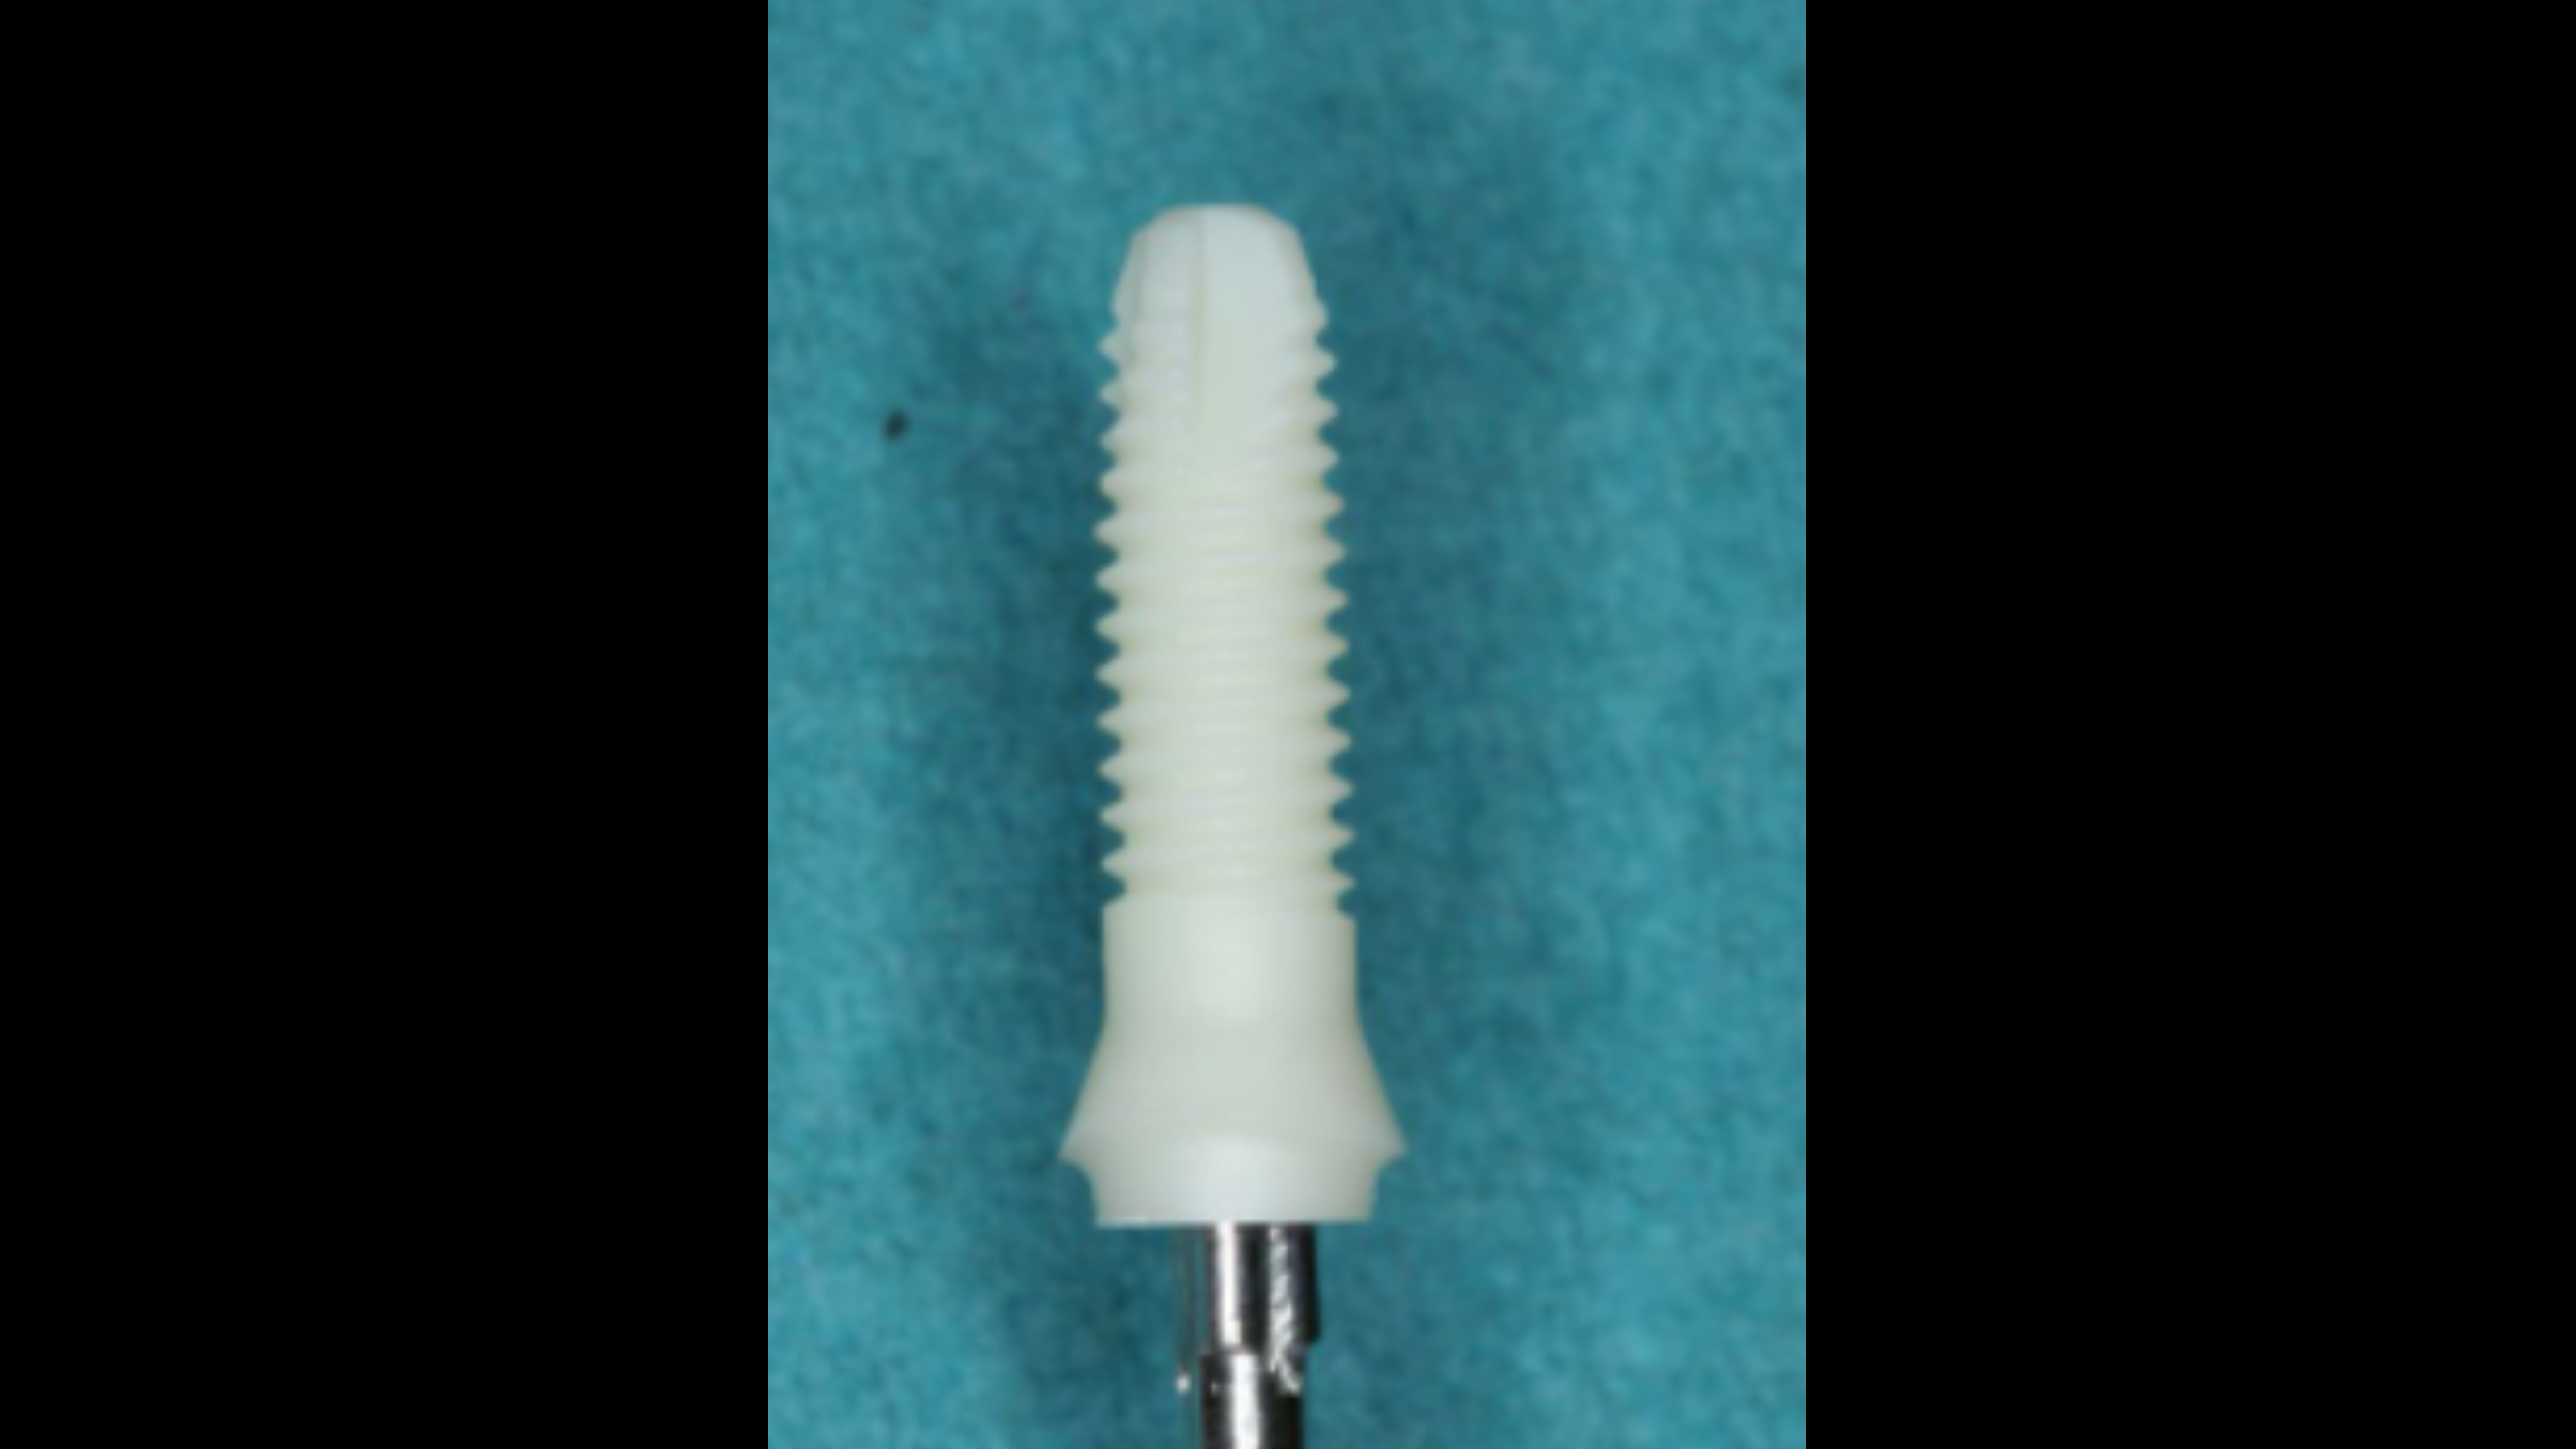
Figure 4:
Patent™ implant size 13x4,5 mm
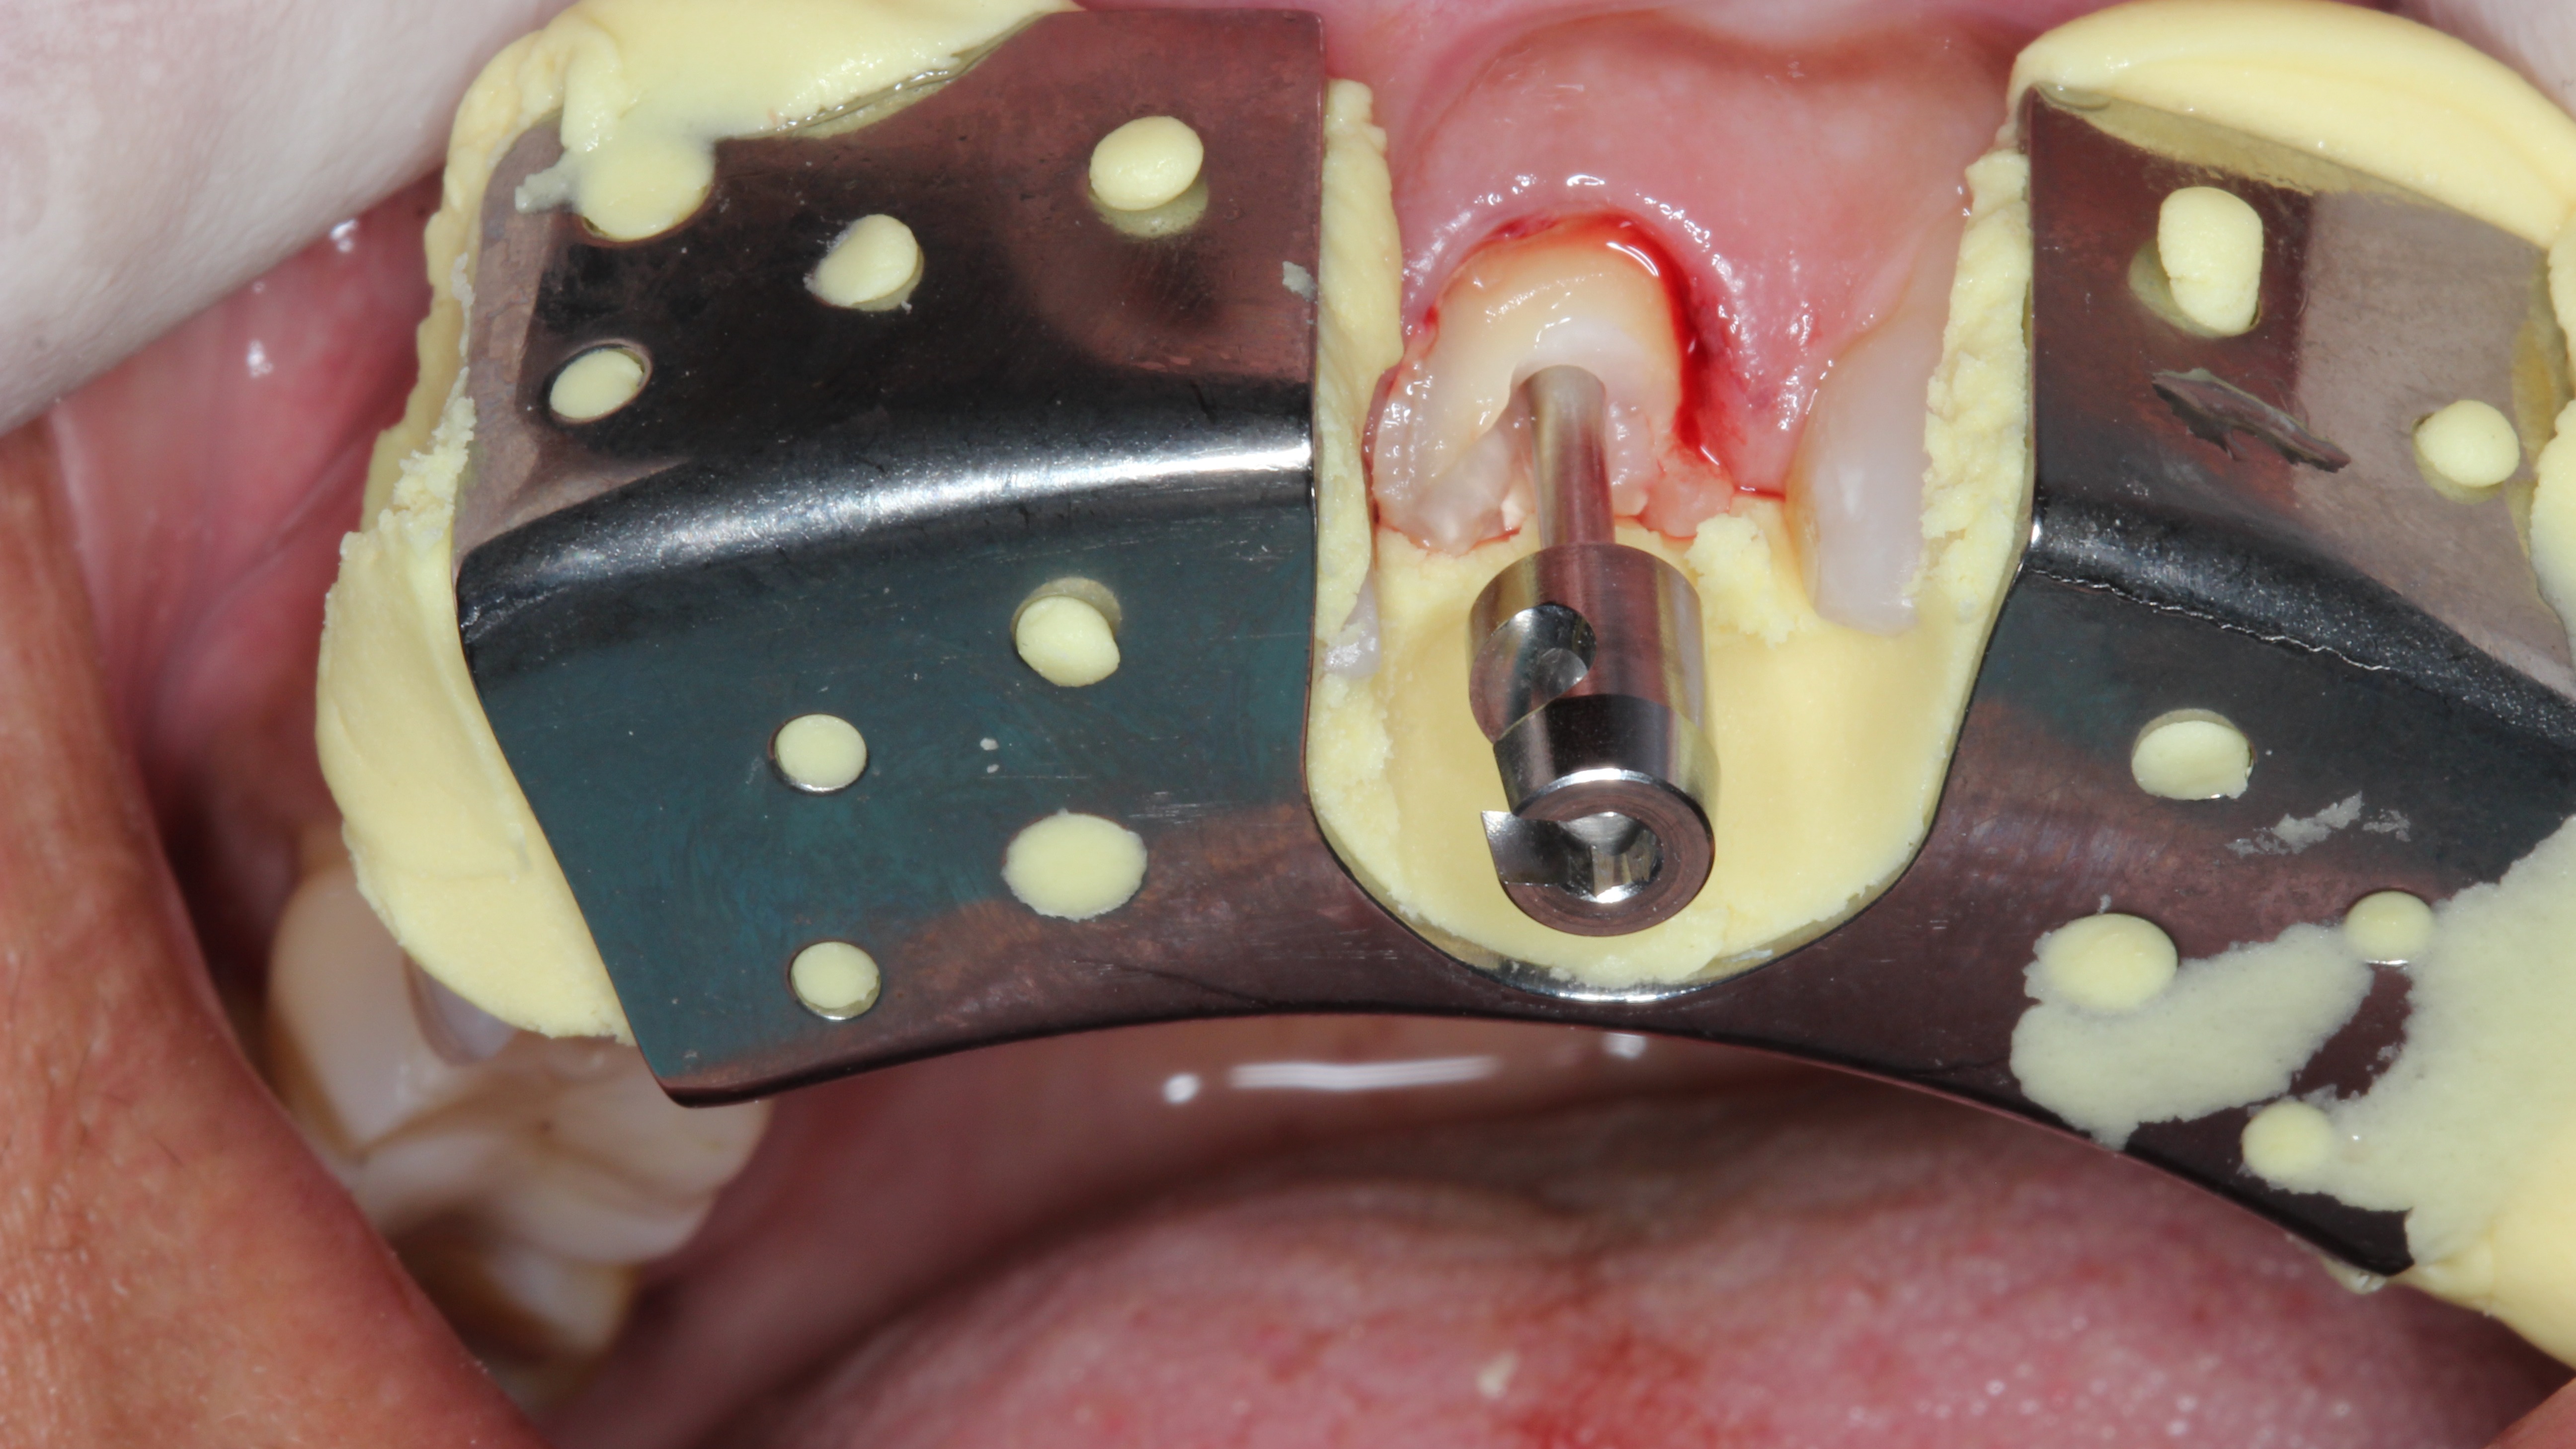
Figure 5:
Relined root extractor in situ
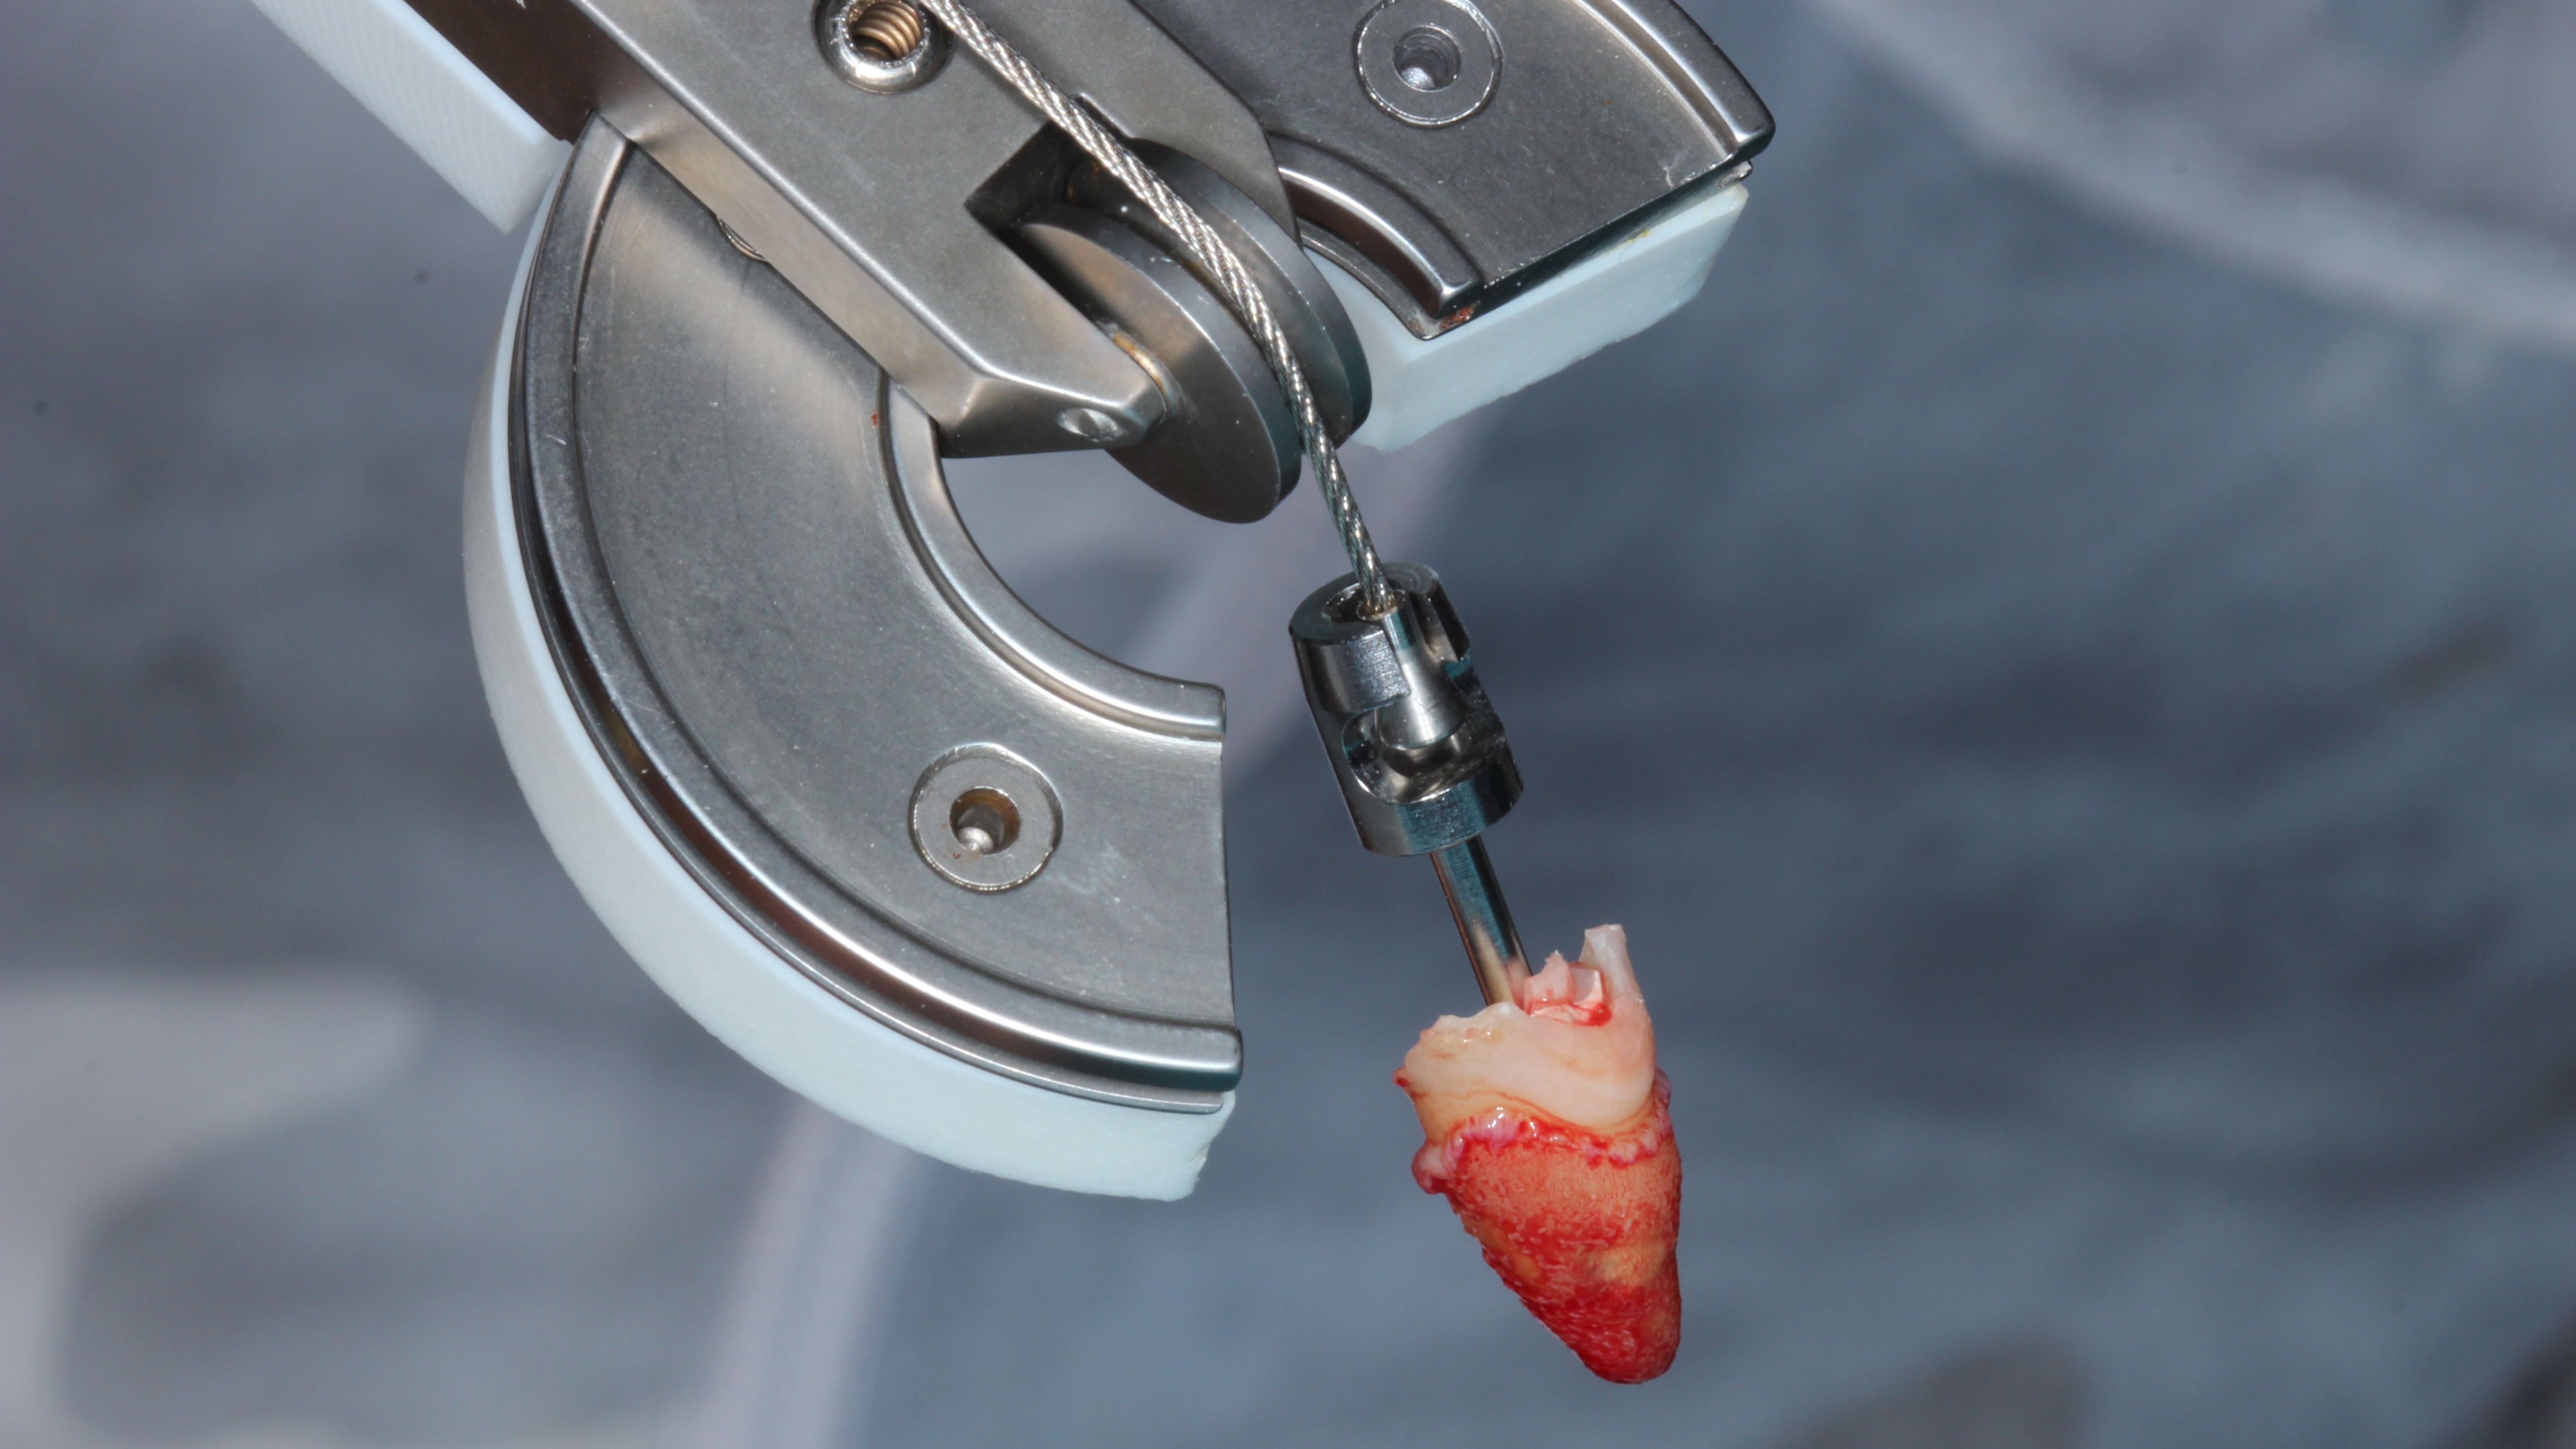
Figure 6:
The extracted root
Initial Situation
A 30-year-old female patient presented for emergency treatment at our clinic with a fractured upper left central incisor (tooth 21). The fracture was not visible (Fig. 1), but the crown soon chipped and splintered (Fig. 2). Based on a conventional radiograph (Fig. 3), we decided, together with the patient, to extract the tooth and immediately place a two-piece Patent implant 13 mm in length and 4.5 mm in diameter (Fig. 4). We also decided that an immediate loading protocol was appropriate and a provisional crown should be placed in the same session (3,6).
We had considered three alternative courses of treatment:
• Extraction with no immediate other action besides provisionalization
• Extraction, augmentation with platelet-rich fibrin and bone-grafting material and subsequent provisionalization
• Extraction, immediate implant place-ment and, if possible, immediate restoration with a temporary crown. If immediate restoration had not been possible because of insufficient primary stability of the implant, another fixed prosthetic solution would have had to be found. The great advantage of immediate restoration is that all structures – including the gingiva (papillae) and the bone – are optimally preserved (4,5).
Pretreatment
A root extractor was deployed and supported by the neighbouring teeth (Fig. 5) to allow atraumatic extraction to preserve the buccal bone. A complete and healthy alveolar bone is a prerequisite for a securely anchored implant. We choose an atraumatic extraction protocol that created favourable conditions by preserving the bone volume and preparing the bone optimally for the placement of the implant.
The three-dimensional preservation of hard and soft tissue after extraction is also important for flawless aesthetic and functional implants and restorations. The vestibular bone wall in particular is extremely important for the correct three-dimensional implant placement as well as for the preservation of the soft tissue under the superstructure, particularly in the anterior region. It is therefore essential to prevent or minimize resorptive remodelling processes. After local anaesthesia, the force vector of the extractor was applied in the direction of the central axis of the tooth. The remaining root was removed (Fig. 6). The extraction socket was carefully curetted, removing all fibrous tissue.A silicone key was prepared to facilitate chairside fabrication of the provisional crown.
Surgical procedure and Implant Placement
To prepare the osteotomy, drilling was performed on the palatal side of the extraction socket (Fig. 7) such as to preserve the buccal plate and to avoid putting too much pressure on it as the implant is inserted. Once the osteotomy had been completed using the dedicated surgical kit, the implant was placed at an insertion torque of 40 Ncm (Fig. 8).
After the extraction, the wound had to be cleaned thoroughly with a sharp curette. It is important to treat the implant site gently, and especially not to destroy the buccal bone lamella. Therefore, I marked the site palatally with a round burr and prepared the implant bed to a depth of 13 mm with the 2-mm pilot drill. Once the pilot bore is in place, it is not difficult to extend the implant site to a diameter of 4.5 mm.The implant bed was checked with an appropriate instrument and disinfected with ozone. The implant can be placed either manually with a ratchet or with a suitable drill. In this case, primary stability was achieved at a torque of 40 Nm (Fig. 9). A control radiograph was taken (Fig. 10), and the fiberglass post was prepared – at chairside but extraorally. To facilitate the preparation, a dummy implant was used to hold it (Fig. 11). After the try-in, the fiberglass post was cemented with RelyX Unicem.
Finally, the provisional crown was fab-ricated at chairside using the silicone key (8). The fiberglass post was isolated with vaseline oil and the crown was cemented with temporary cement to be retrievable later (Fig. 12). Control radiographs showed that the bone was well preserved (Fig. 13) and that the temporary crown could be delivered (Fig. 14).
The crown had no contact with its antagonists in either static or dynamic oc-clusion. At one day (Fig. 15) and at two weeks (Fig. 16), the soft tissue was healing nicely.
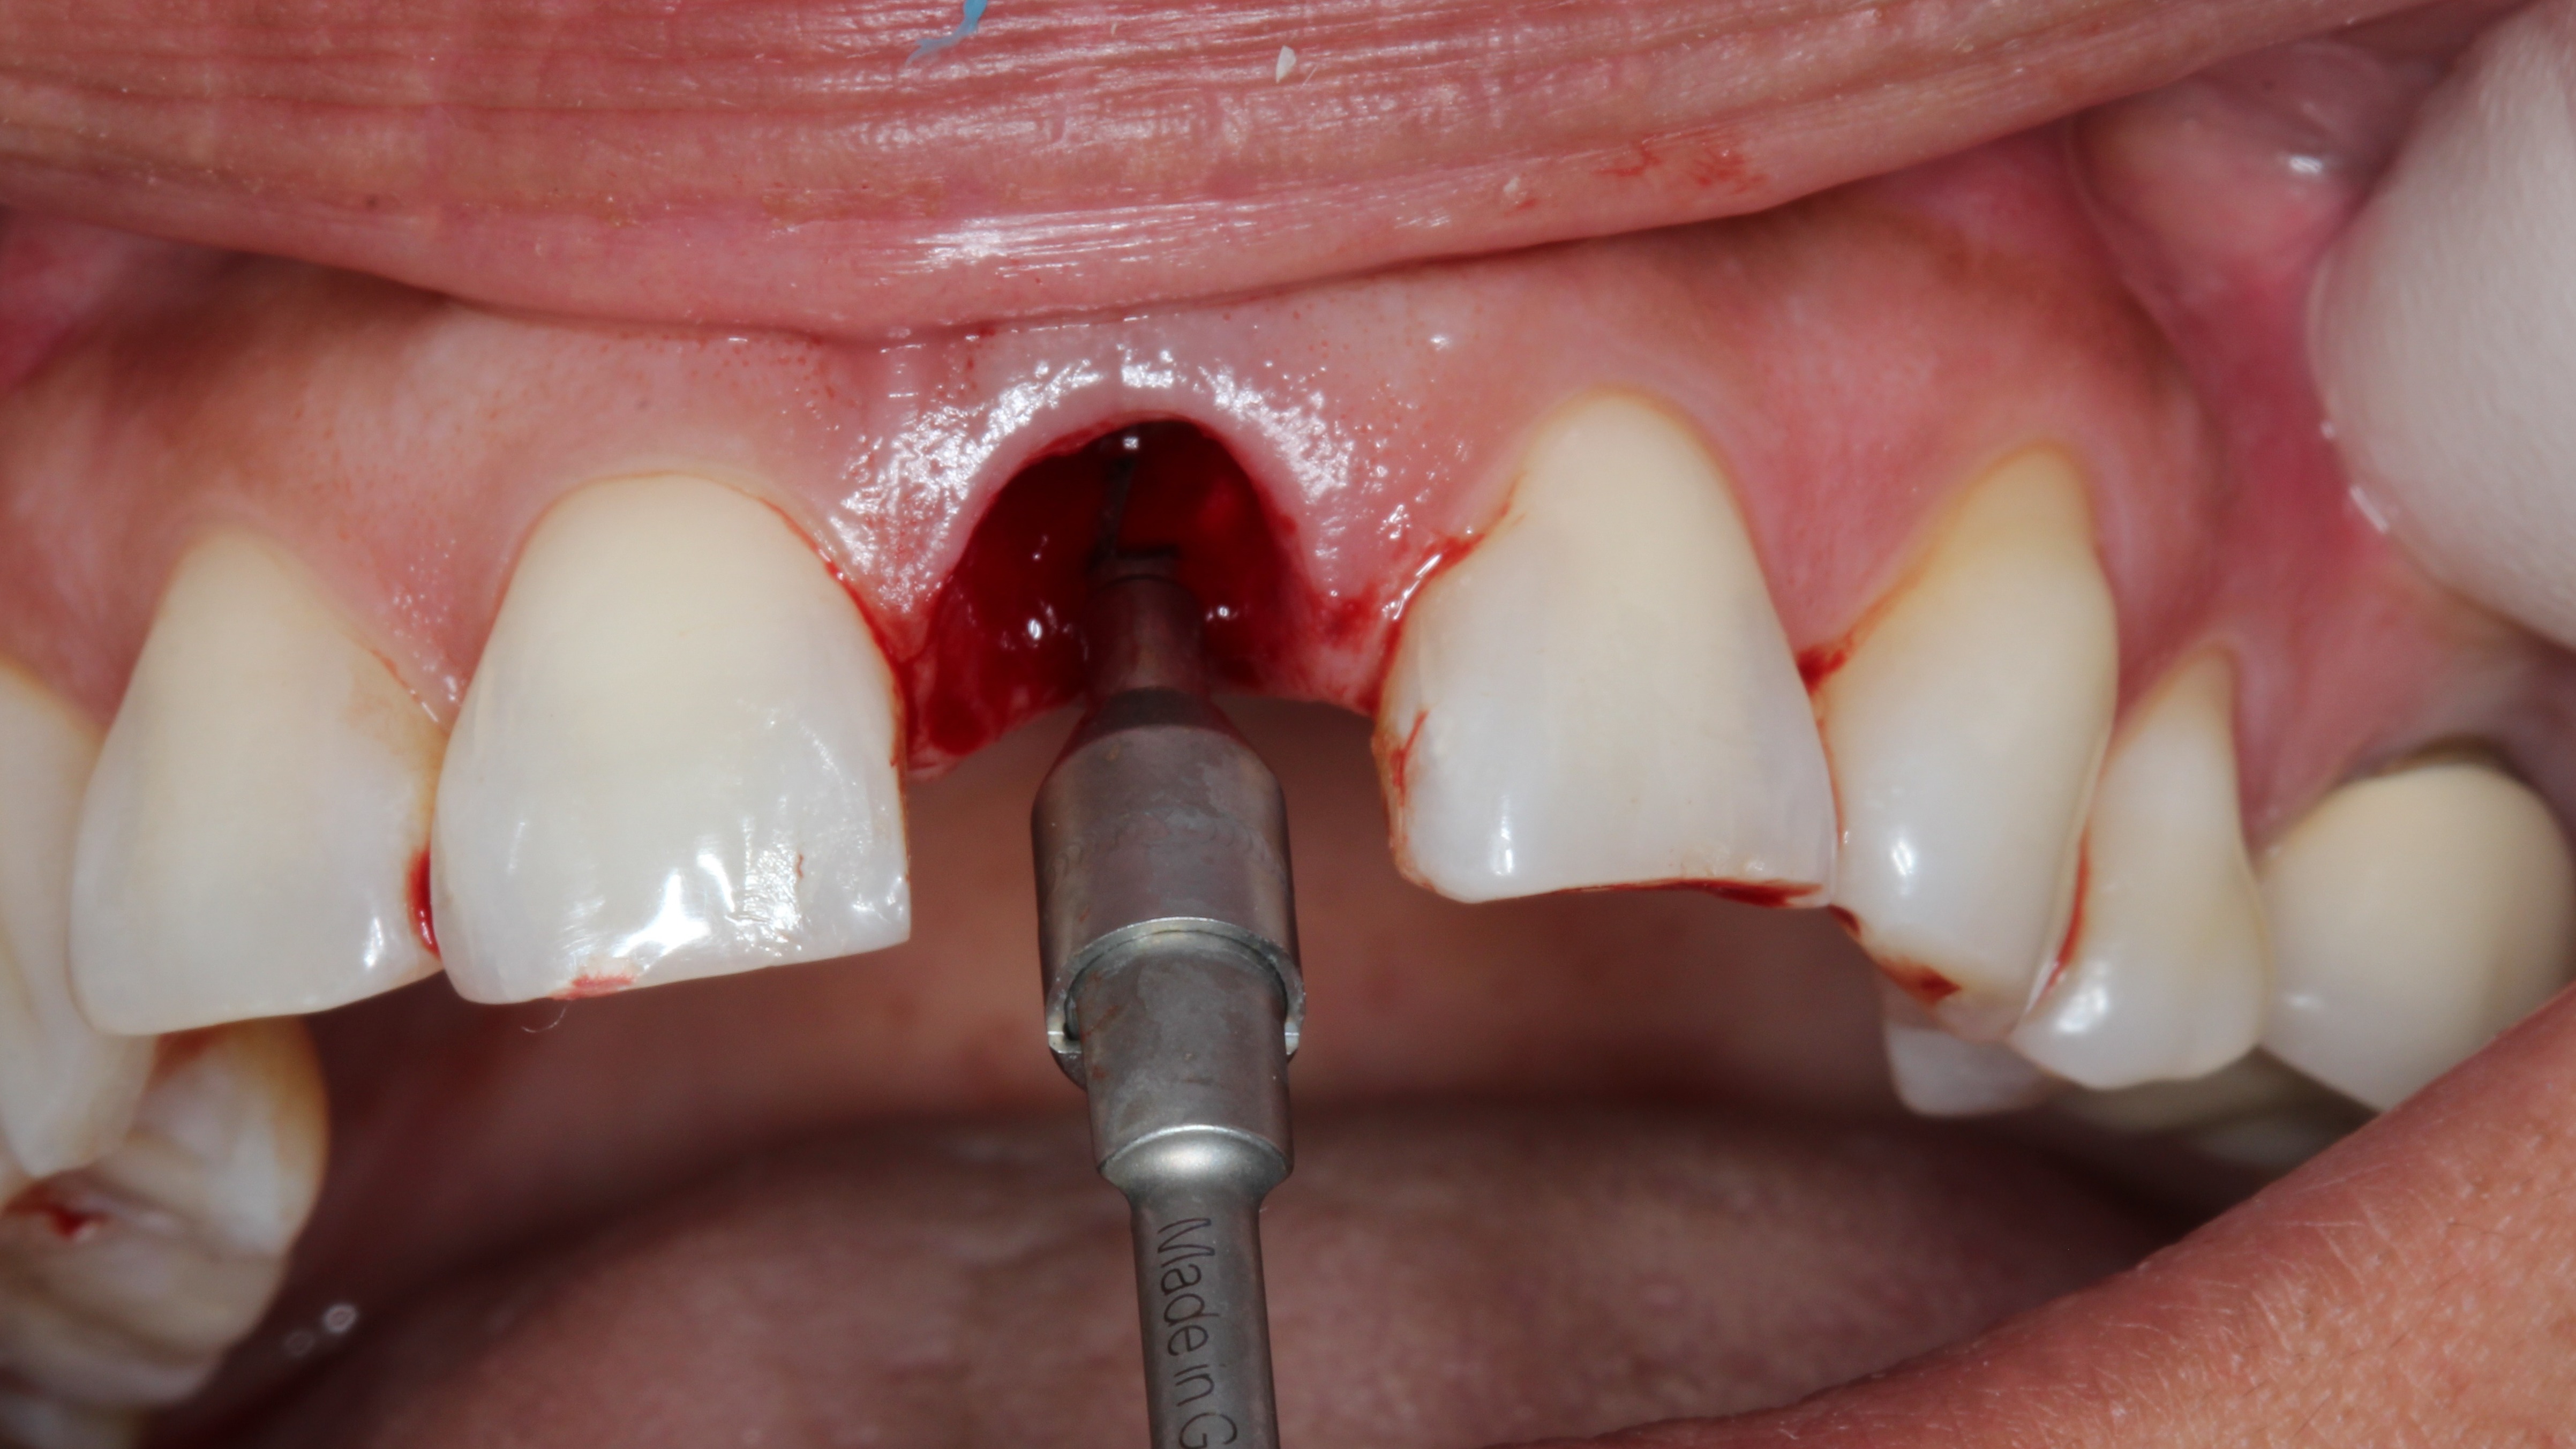
Figure 7:
Drilling the osteotomy in the palatal Wall of the extraction socket
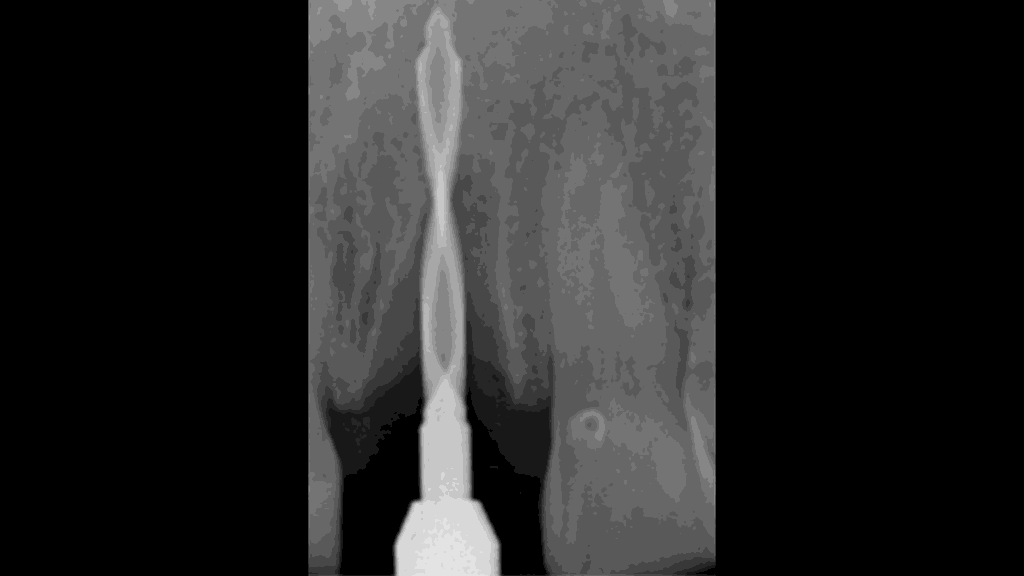
Figure 8:
Drilling the osteotomy on x-ray
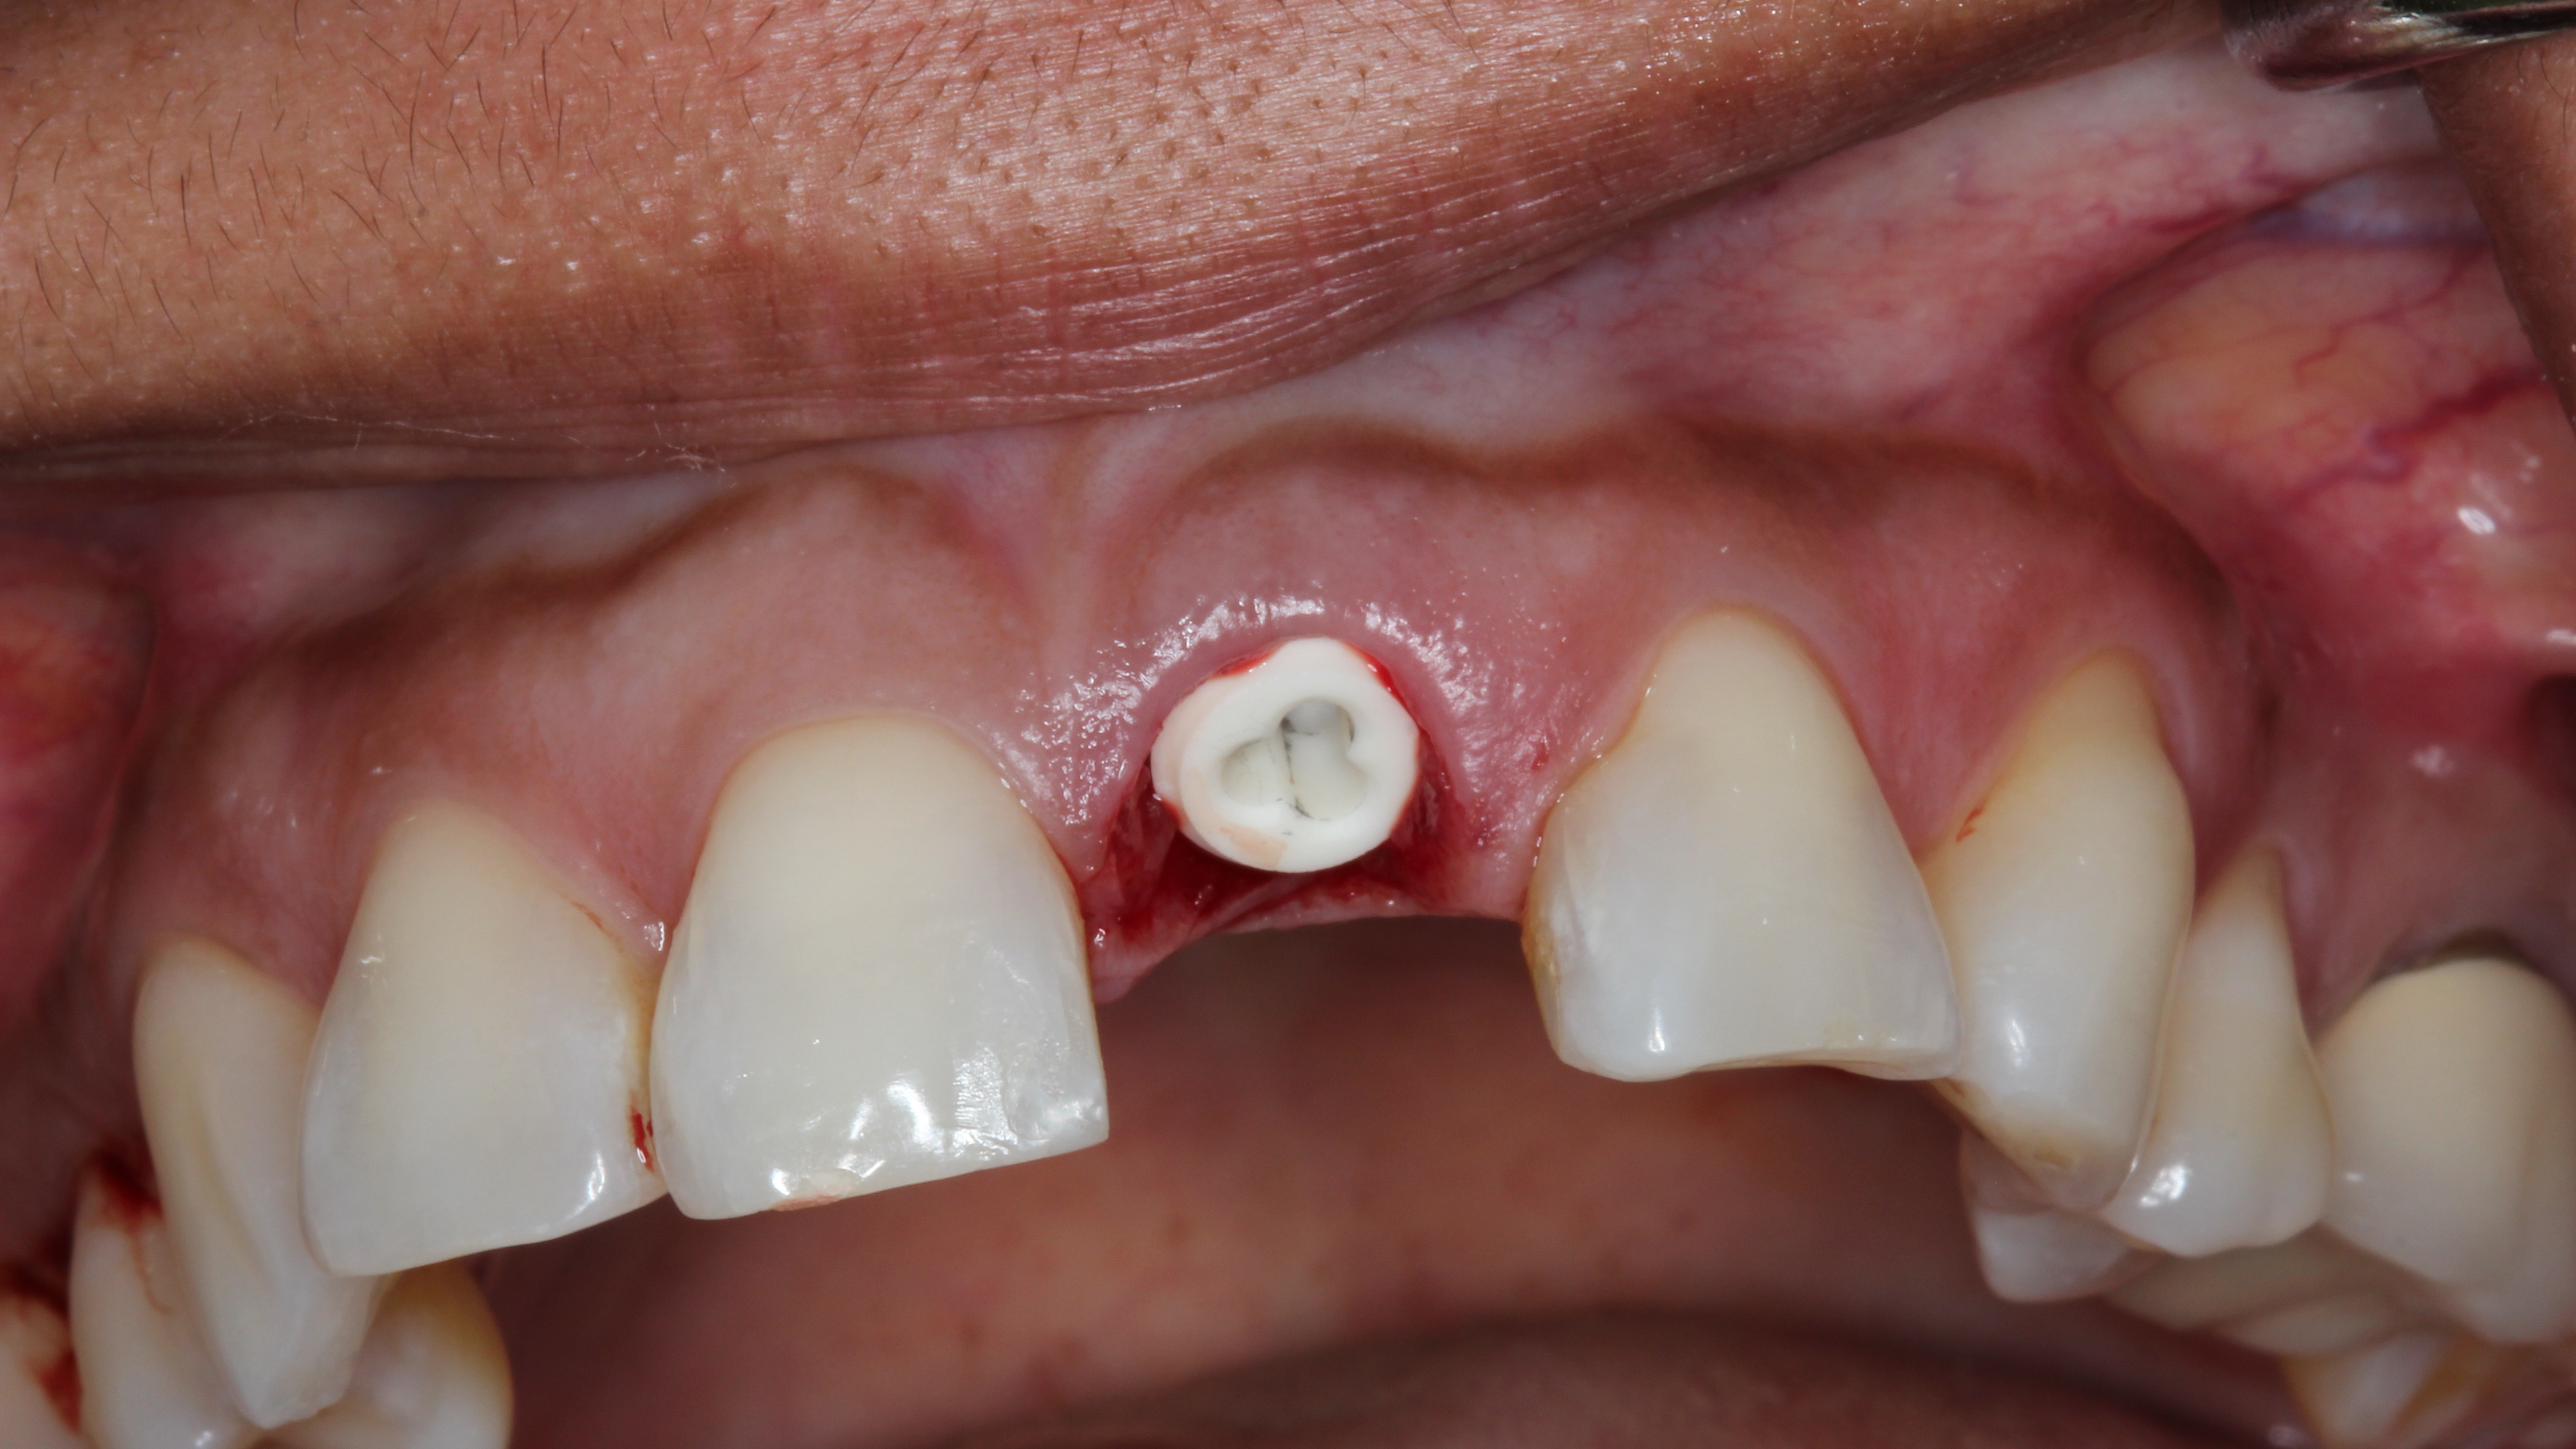
Figure 9:
Patent™ Implant in situ
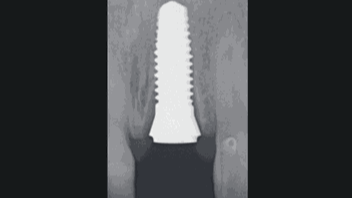
Figure 10:
Situation at implant placement
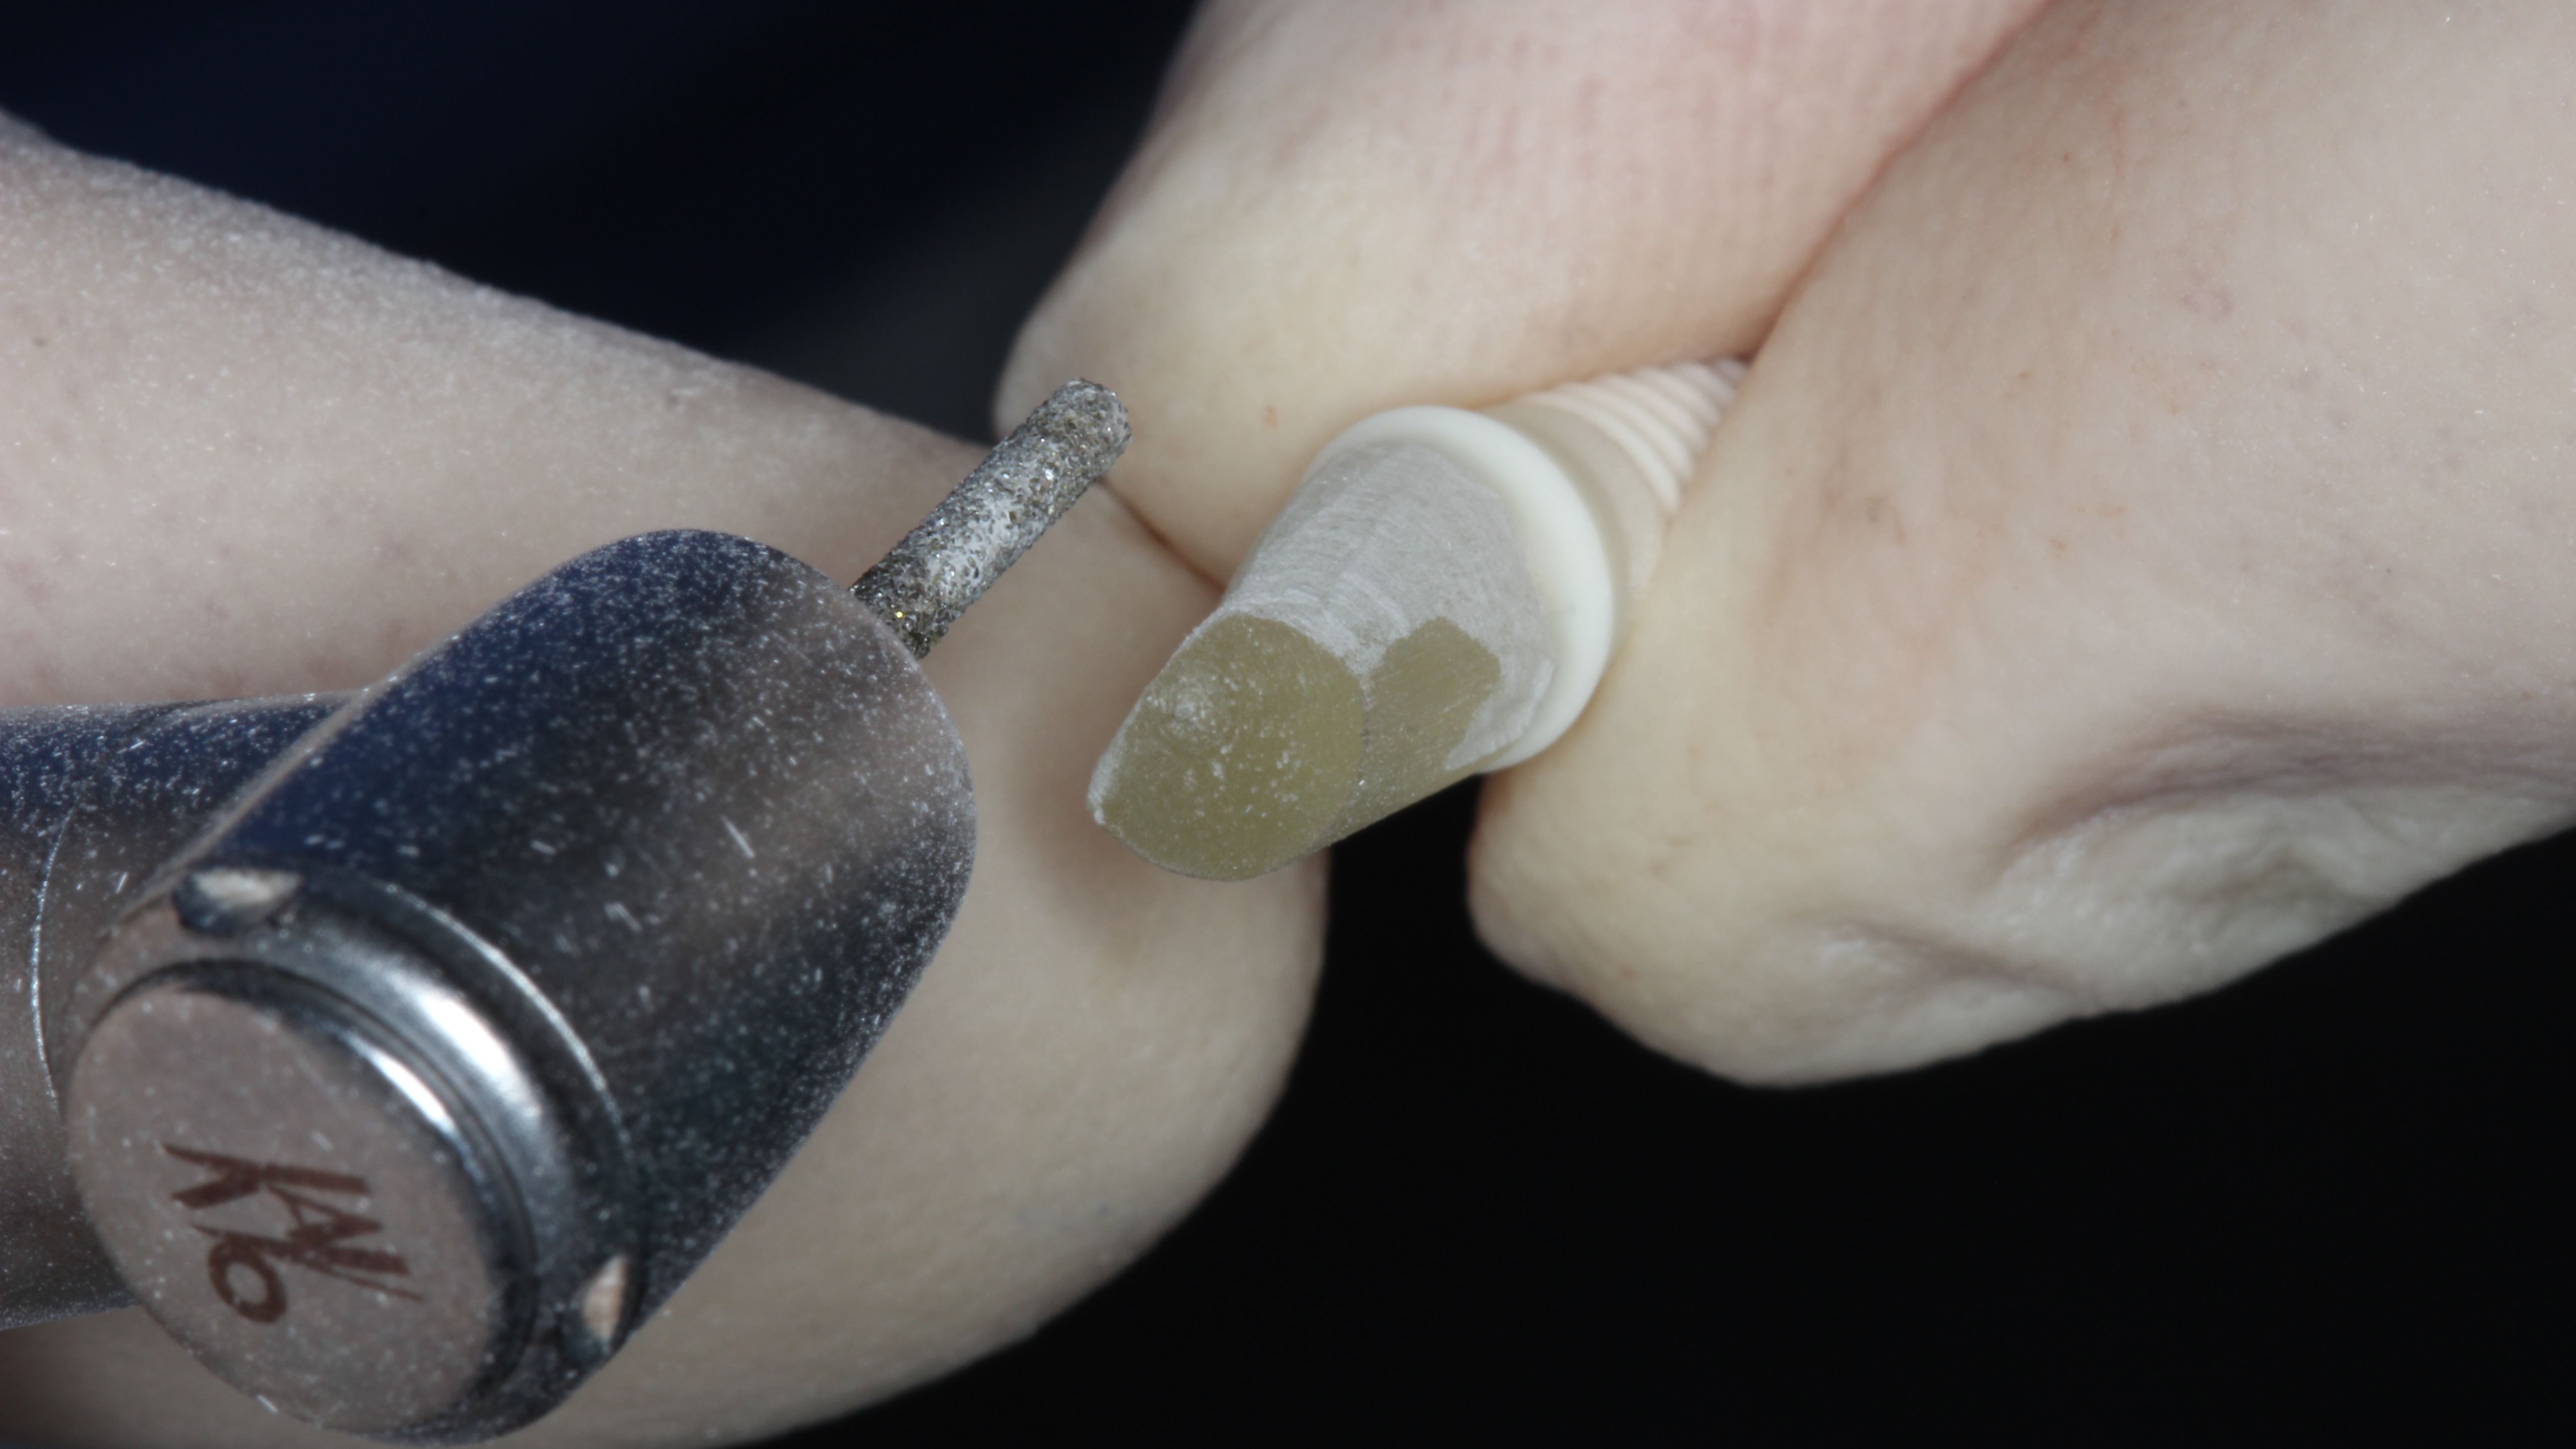
Figure 11:
Chairside preparation (extra-orally) of the glass fiber post

Figure 12:
Glass fiber post cemented after try-in
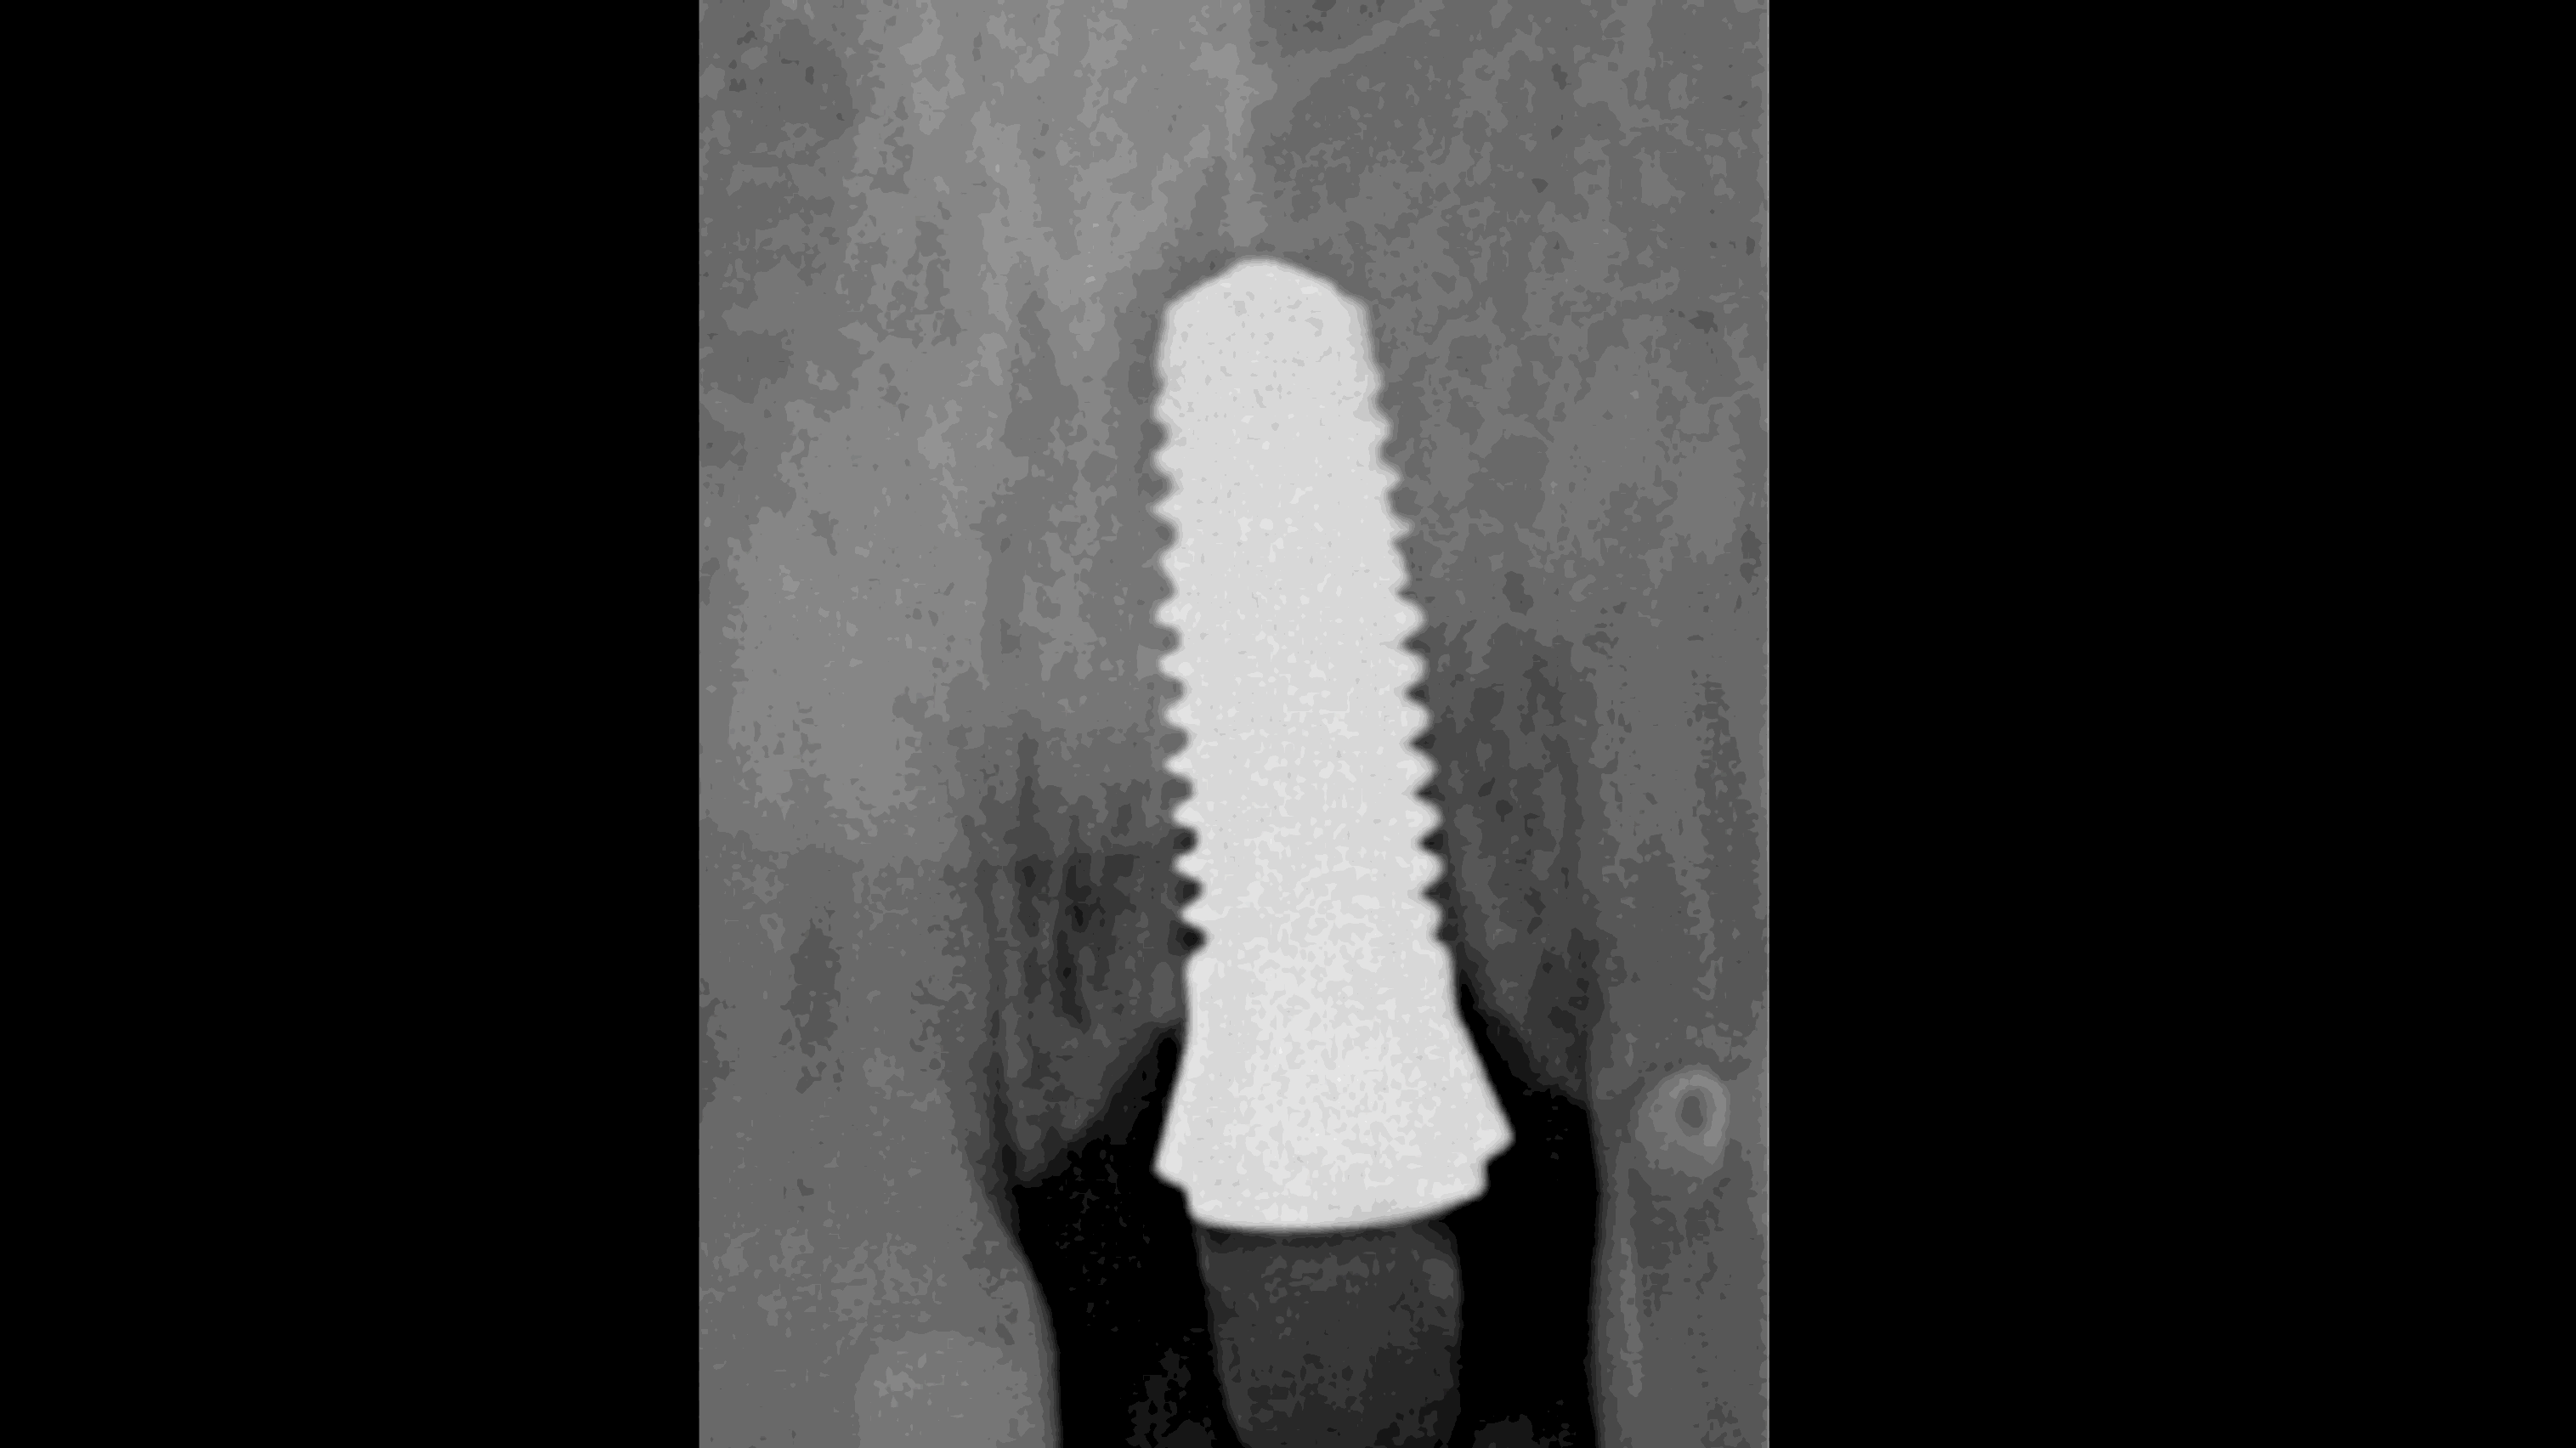
Figure 13:
X-ray after Implantation
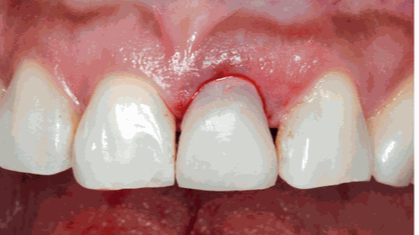
Figure 14:
The temporary crown immediately after surgery
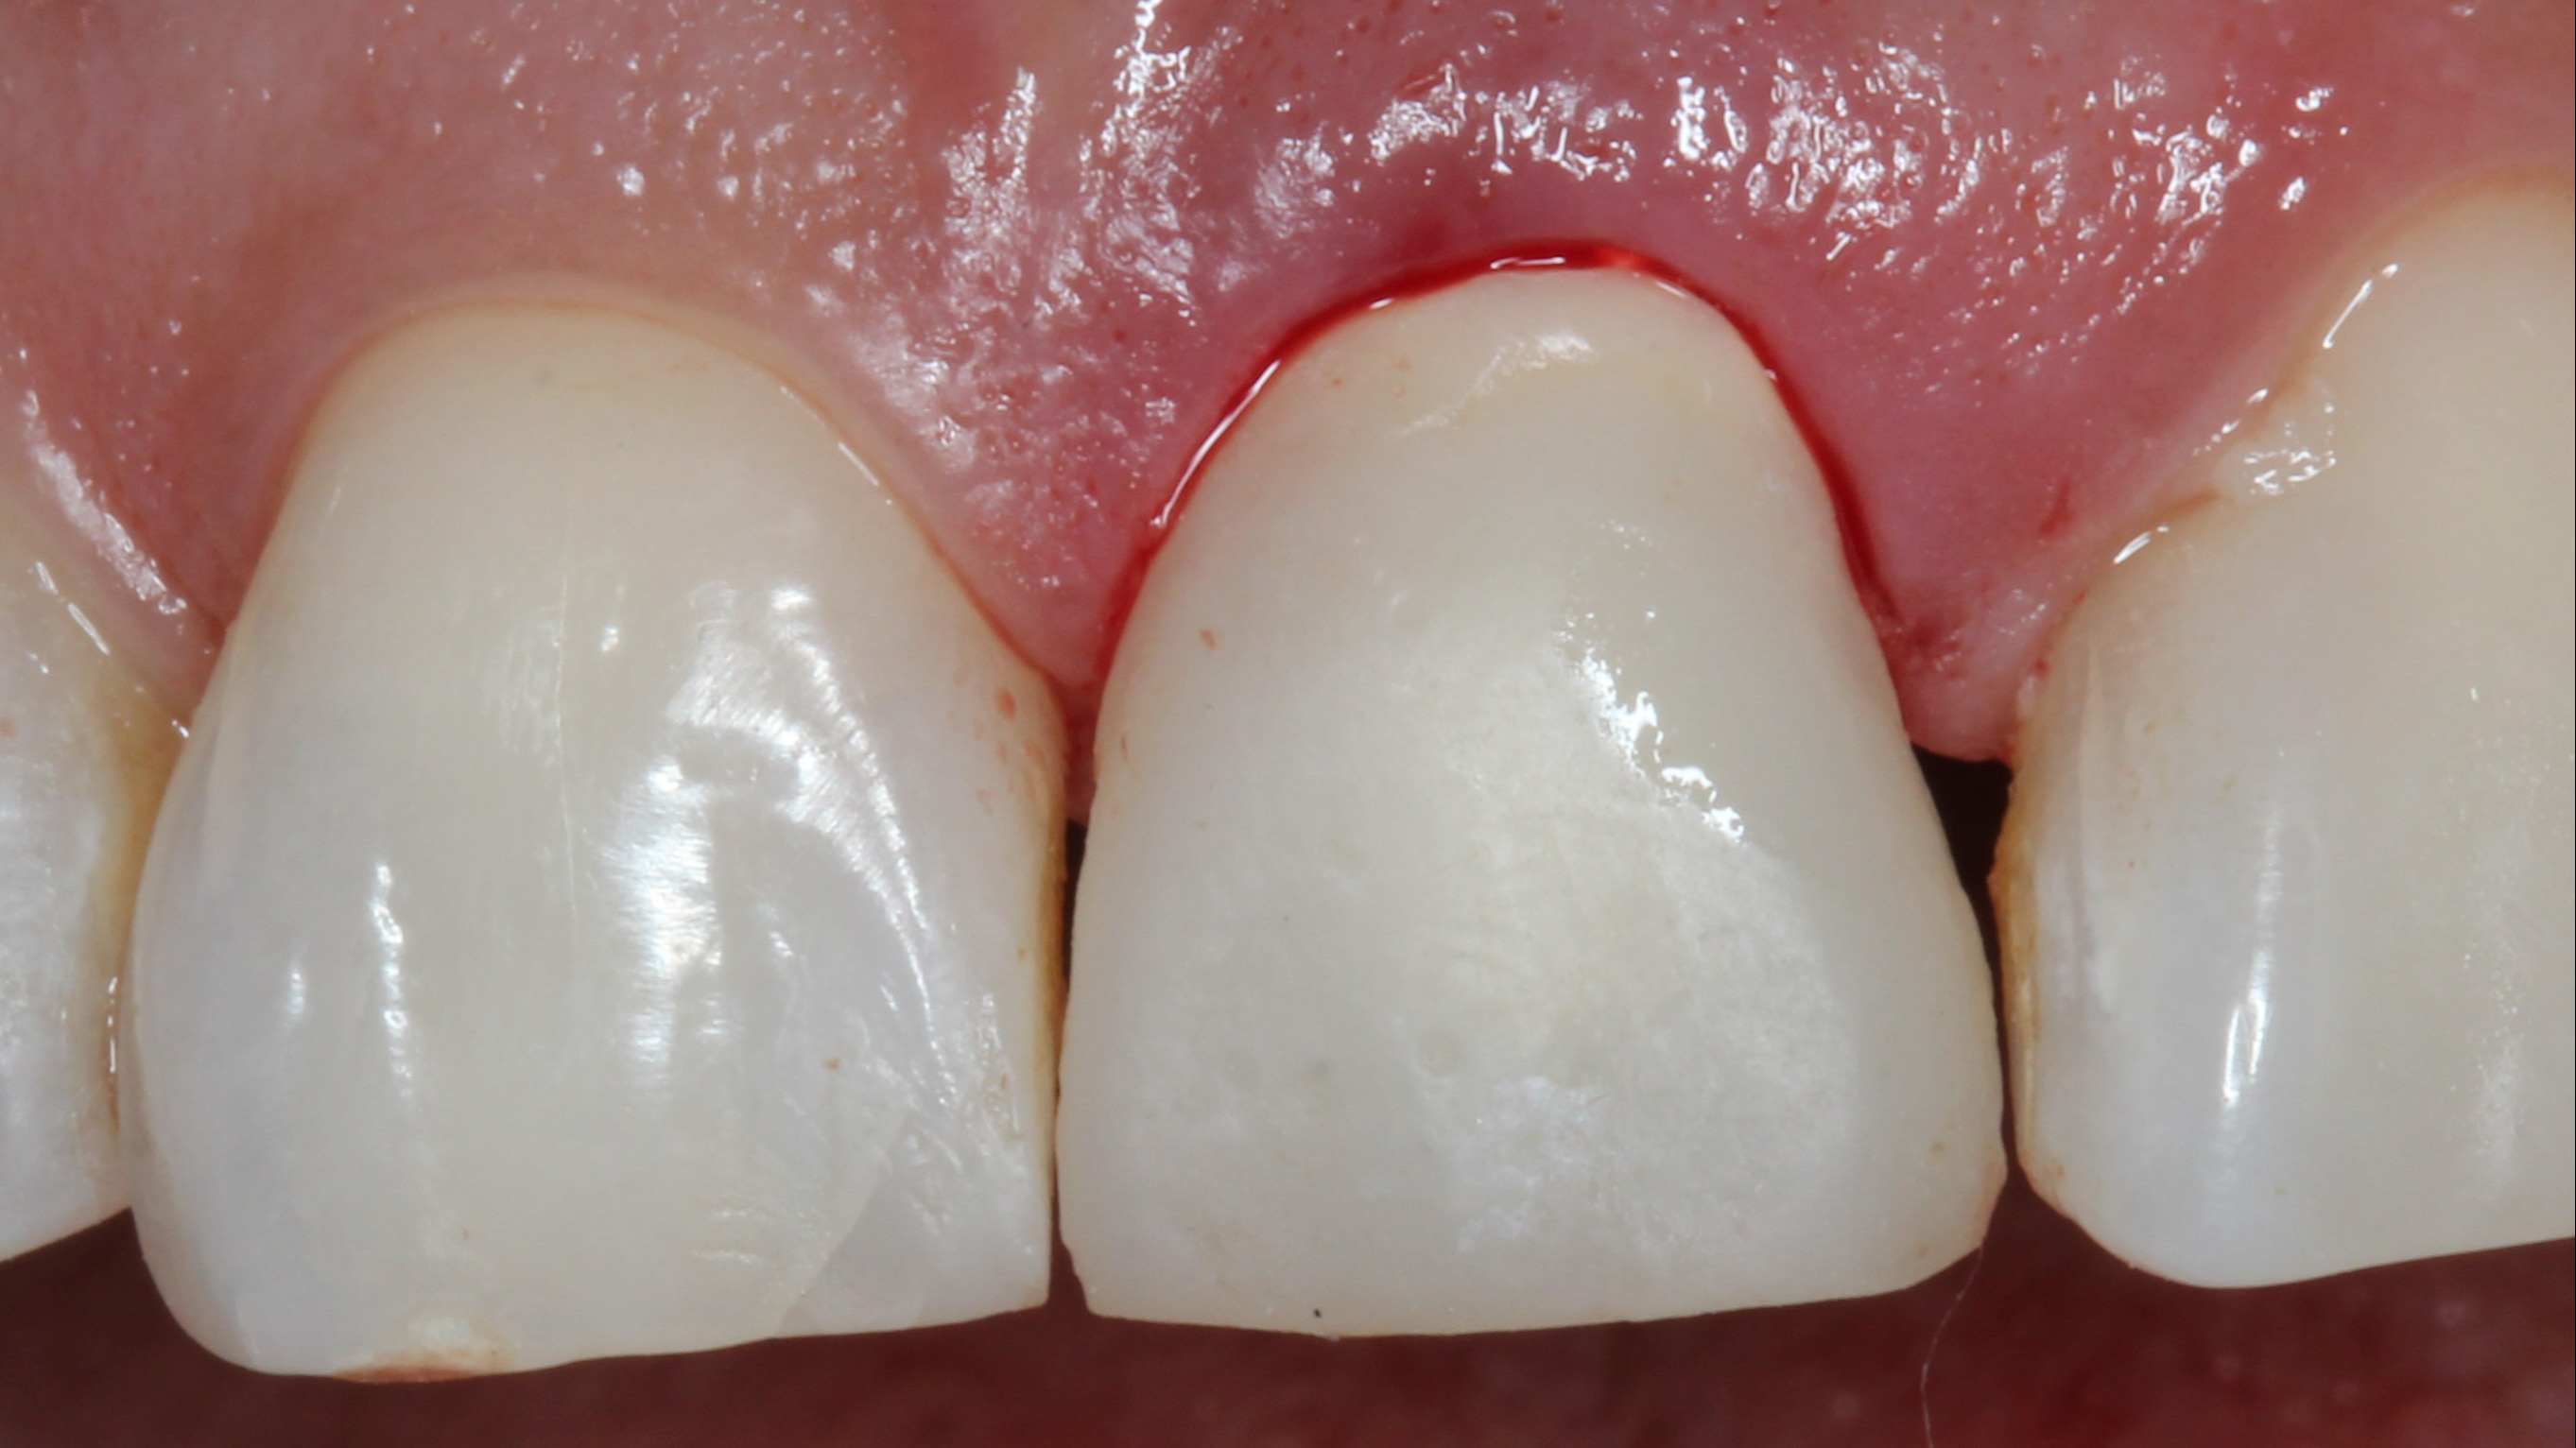
Figure 15:
Situation after one day
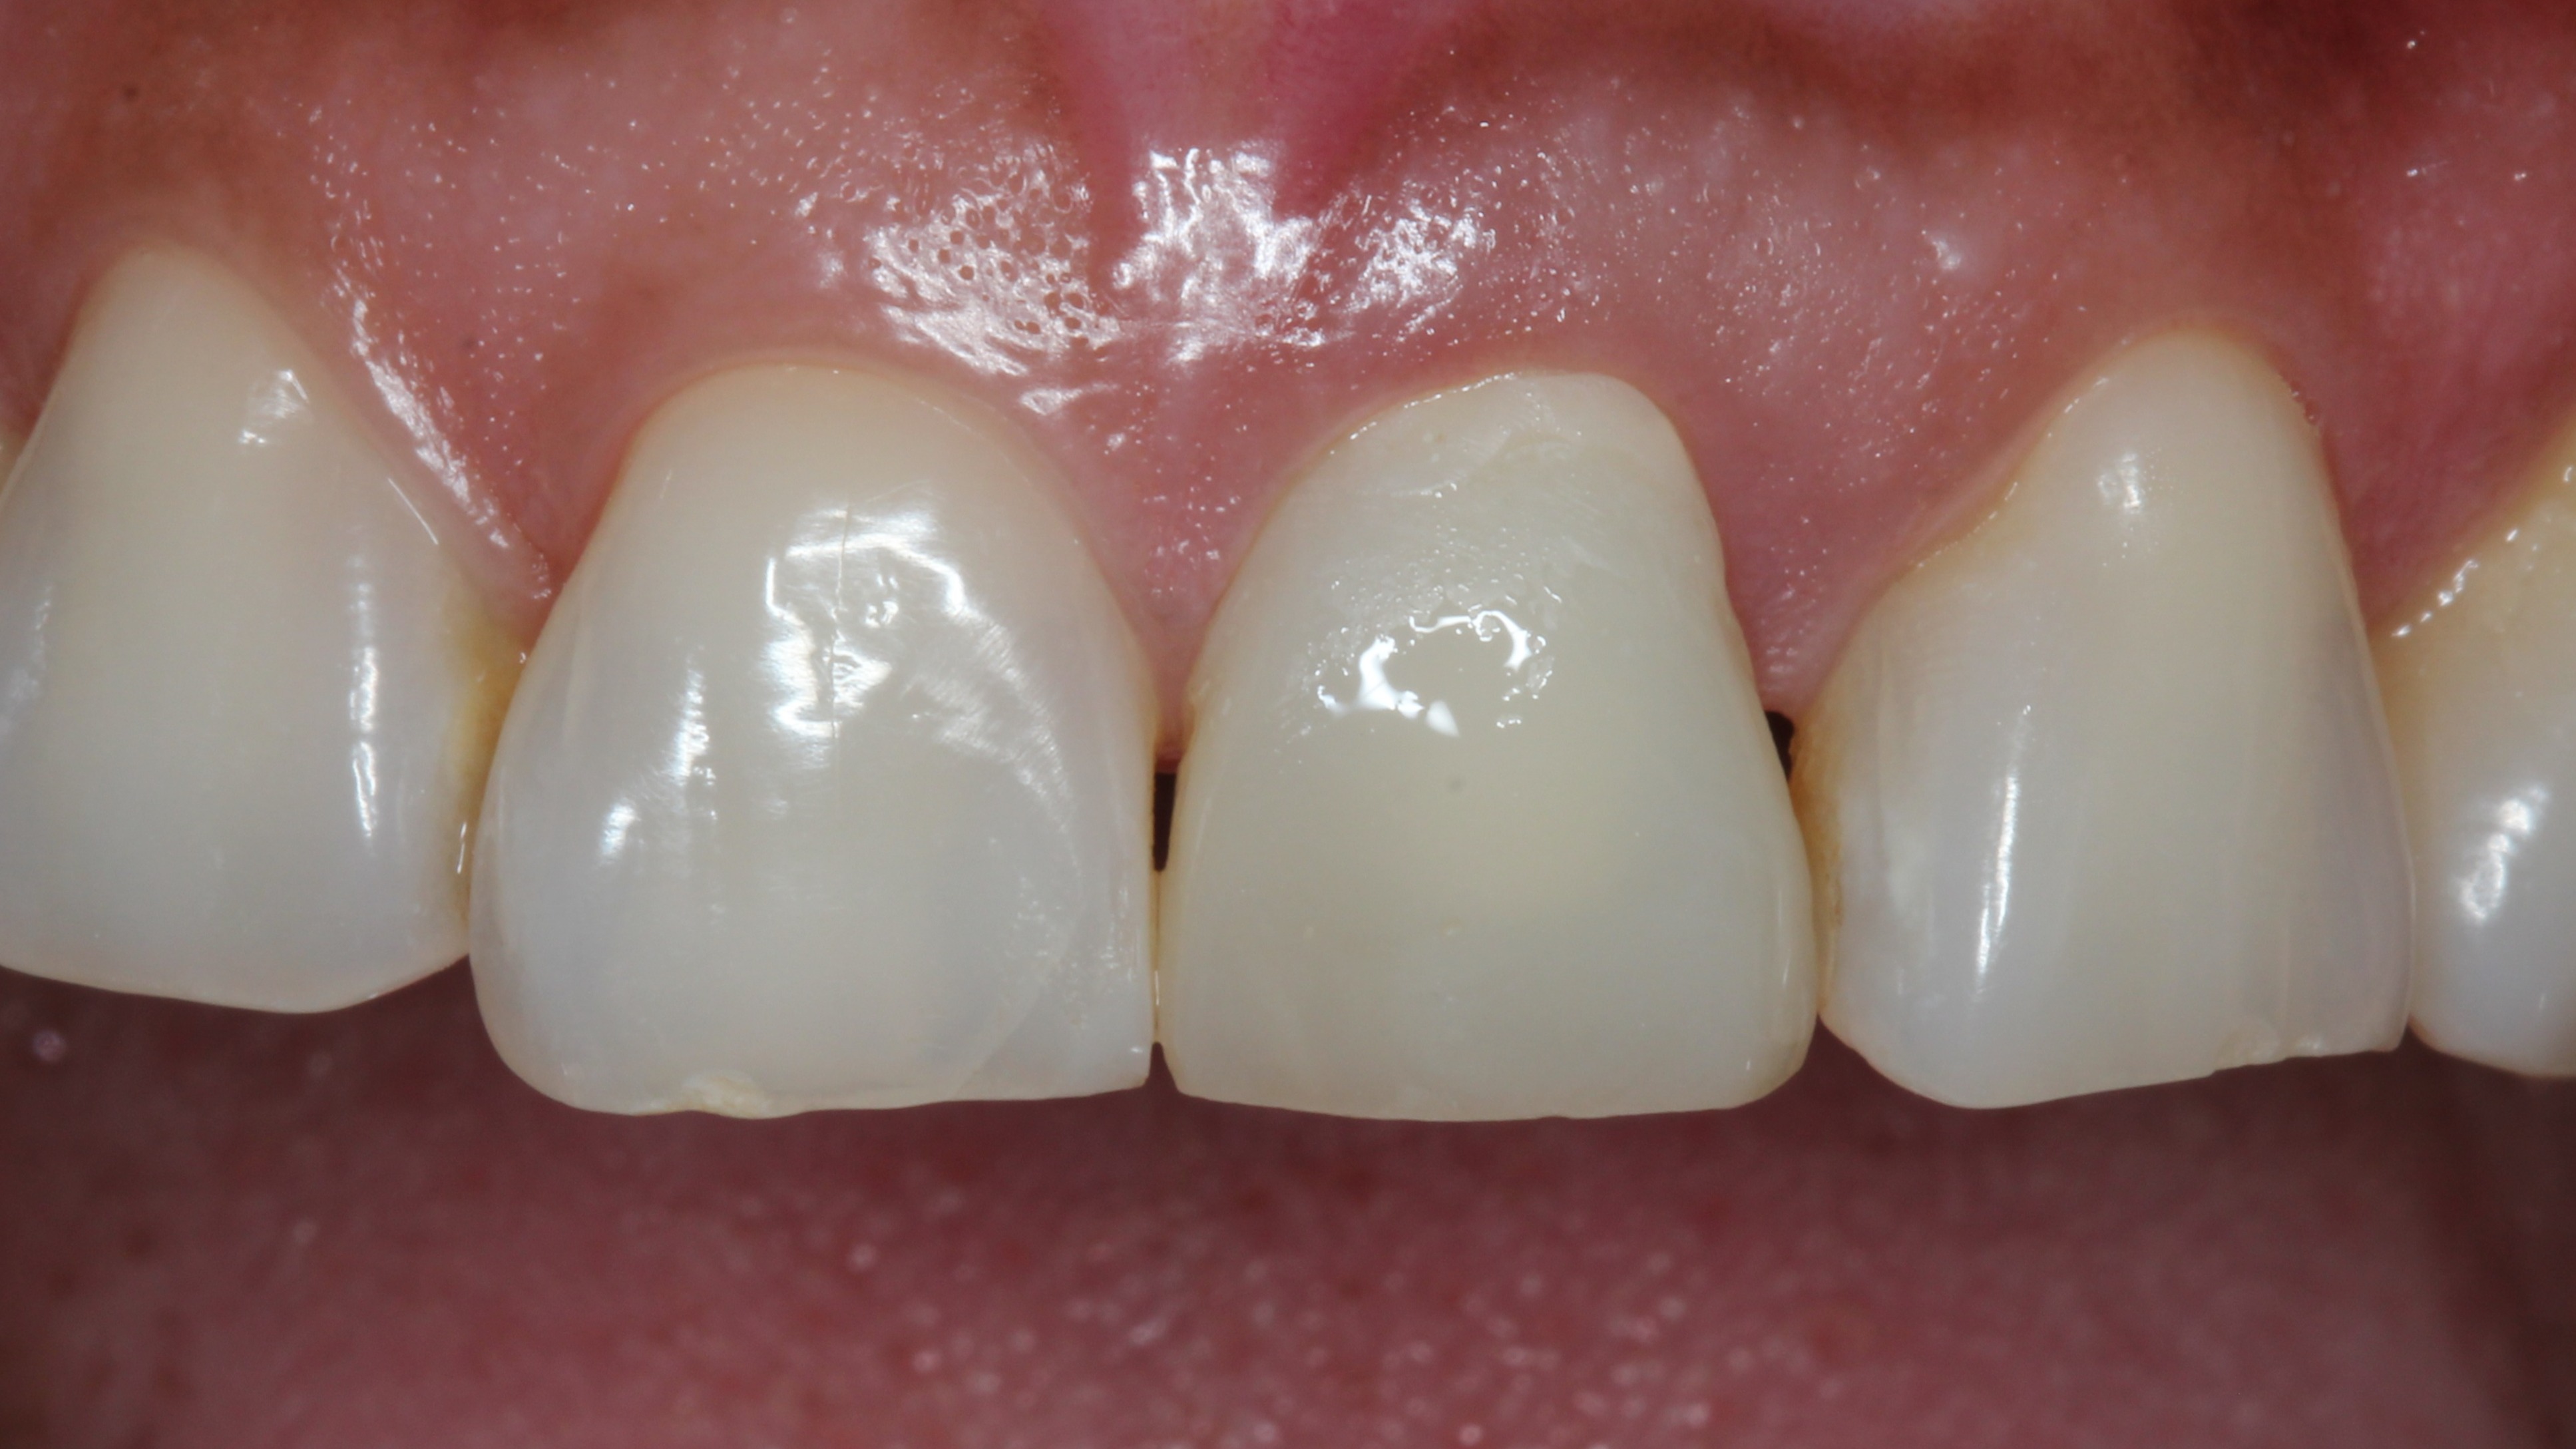
Figure 16:
Two weeks later. You can see the perfect soft tissue healing.
Prosthetic Reconstruction
After six weeks, the dental laboratory provided a second provisional crown (Fig. 17). We had some problems with the shade of the crown due to the transparency of the fiberglass post. Following deliberations with the dental technician, we concealed the die with white composite resin (Fig. 18). After four months of healing, the case was finalized by delivering the definitive crown (Figs. 19 and 20). The soft tissue had remained perfectly healthy [9, 10]. At the five-year follow-up, the marginal bone levels presented fully maintained (Fig. 21).
Conclusion
The Patent™ Dental Implant System is very conducive to immediate placement and restoration. The risk of implant loss is certainly higher than with a two-stage procedure, but after weighing up all the advantages and disadvantages, patient comfort and above all the preservation of the surrounding structures was deemed more important.
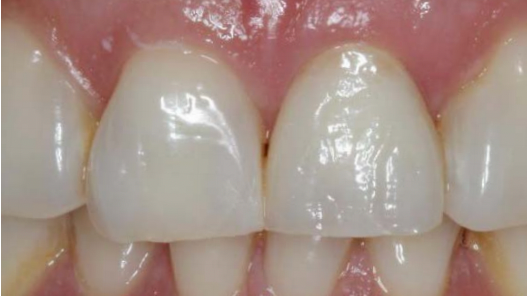
Figure 17:
Lab fabricated provisional in place
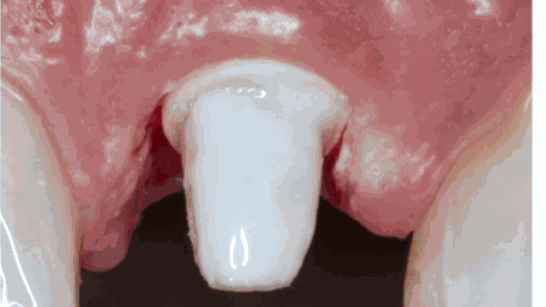
Figure 18:
Prepared stump with white liquid composite

Figure 19:
Final crown
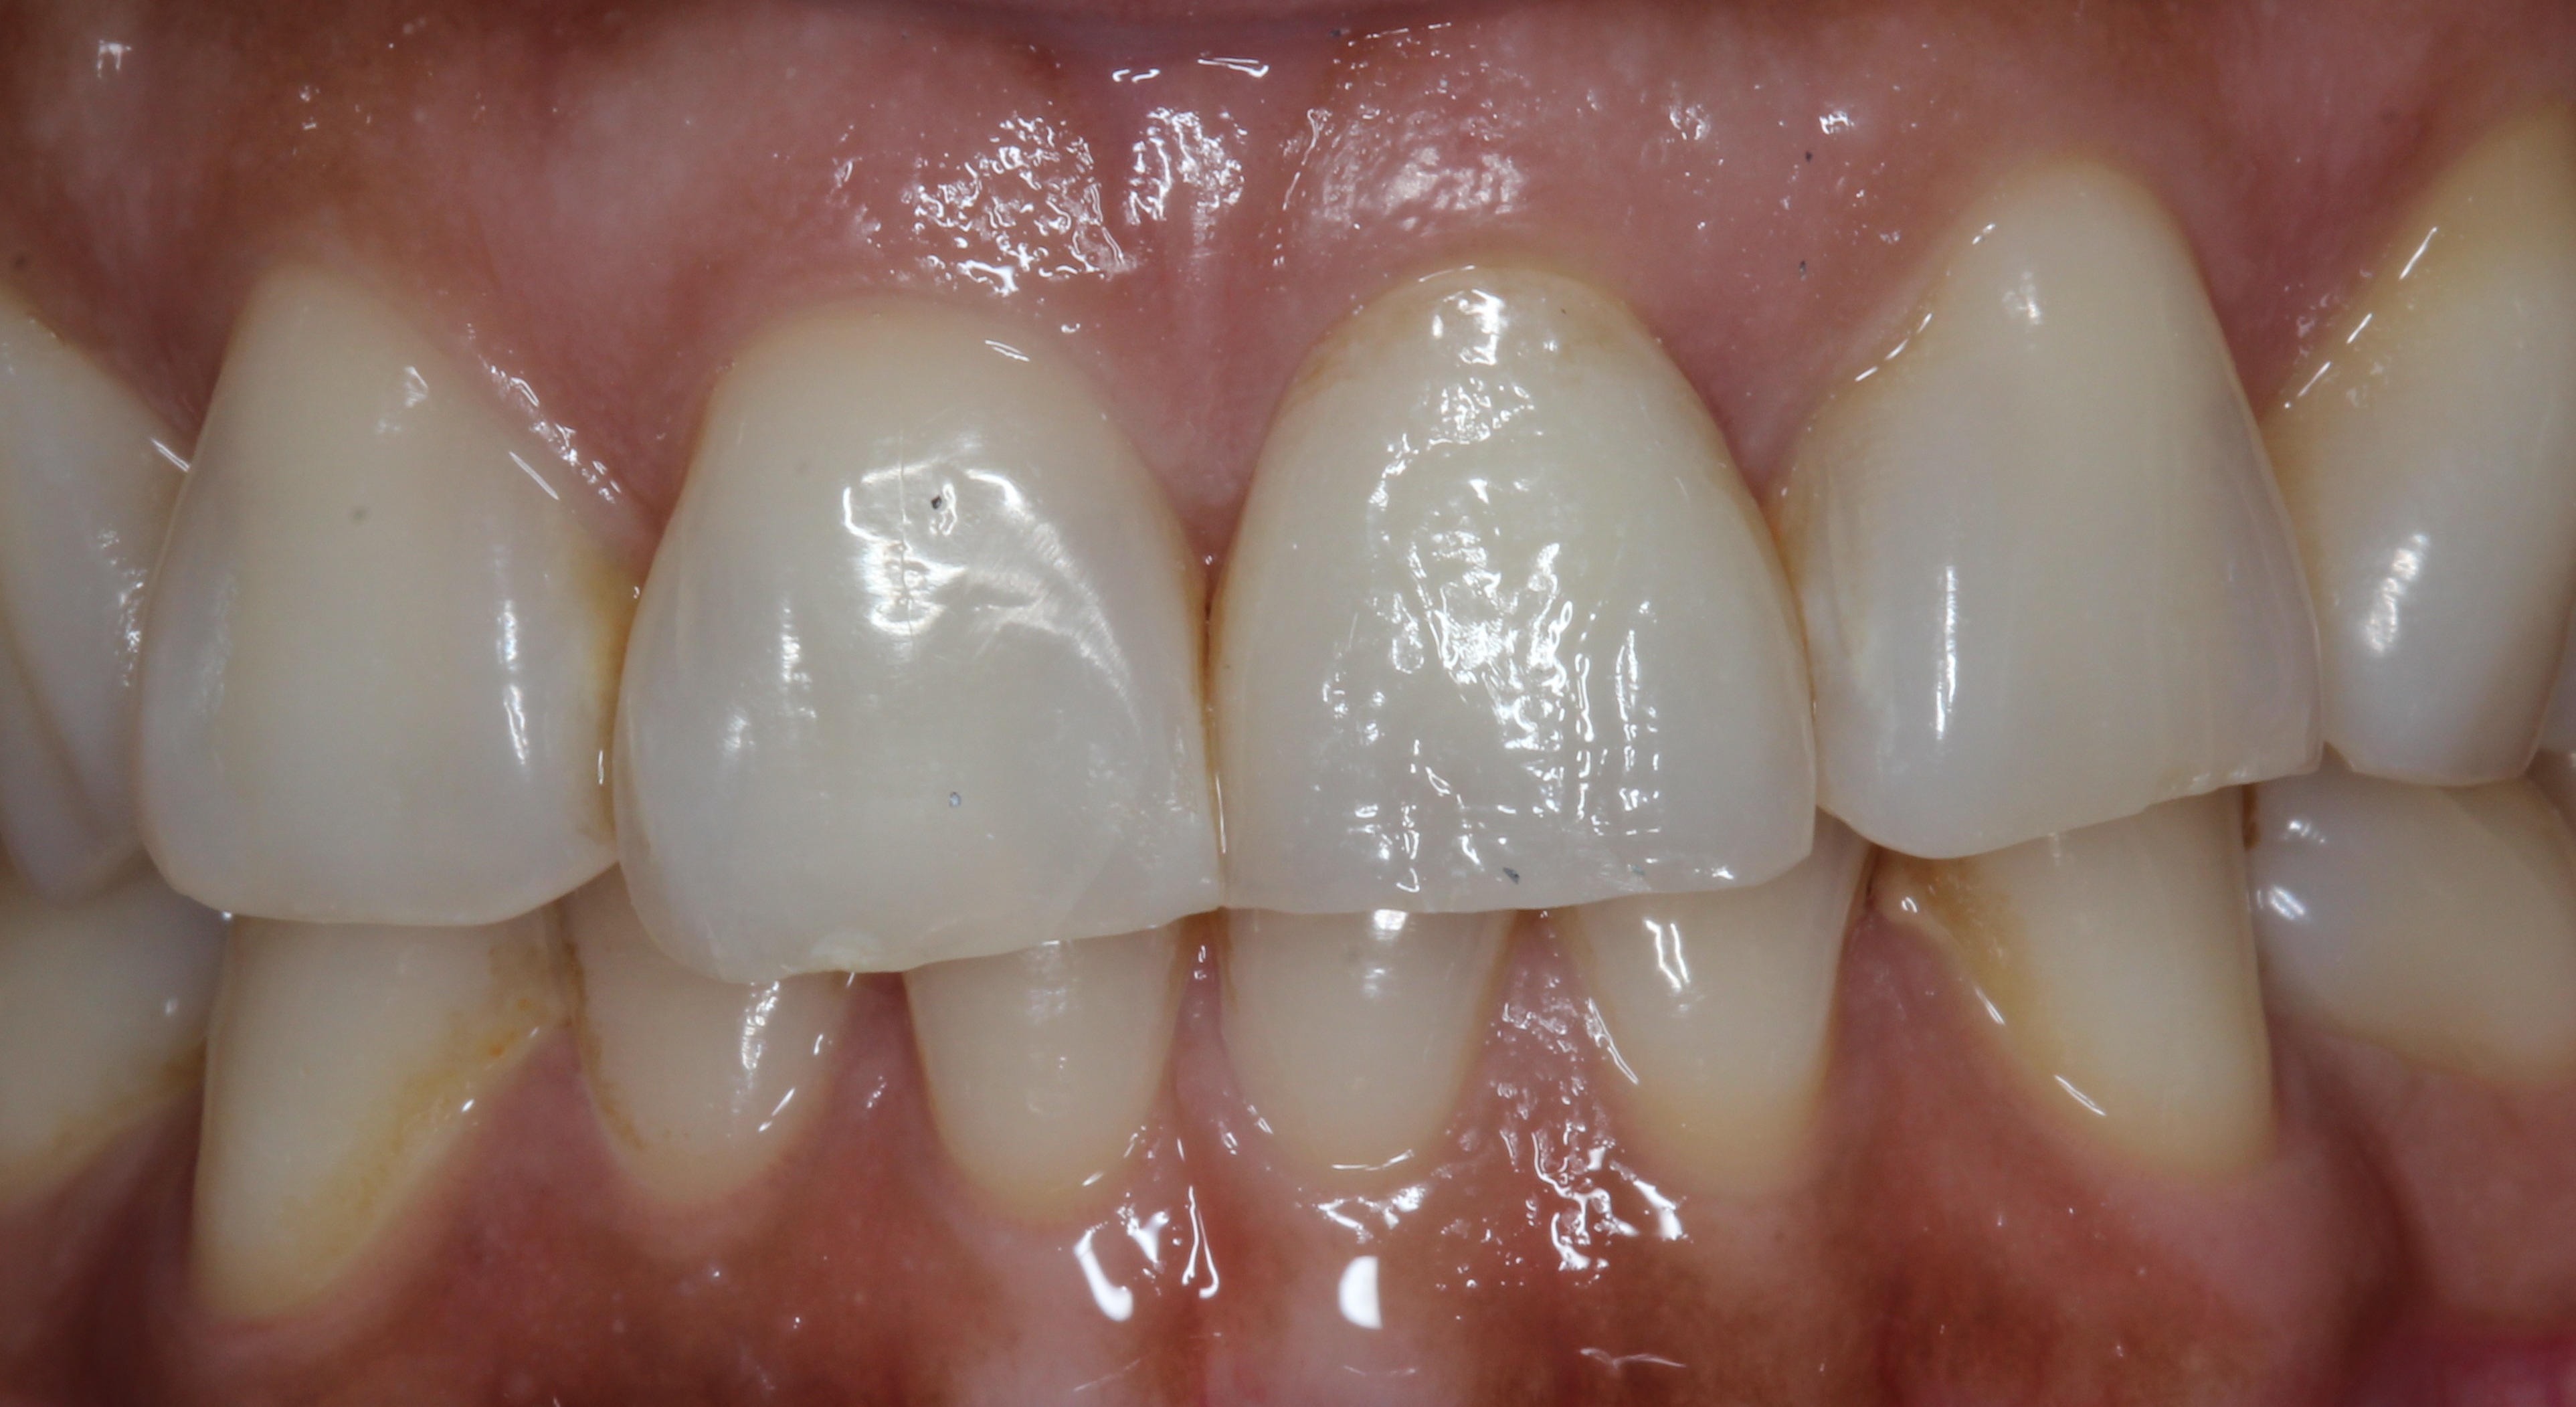
Figure 20:
Final result
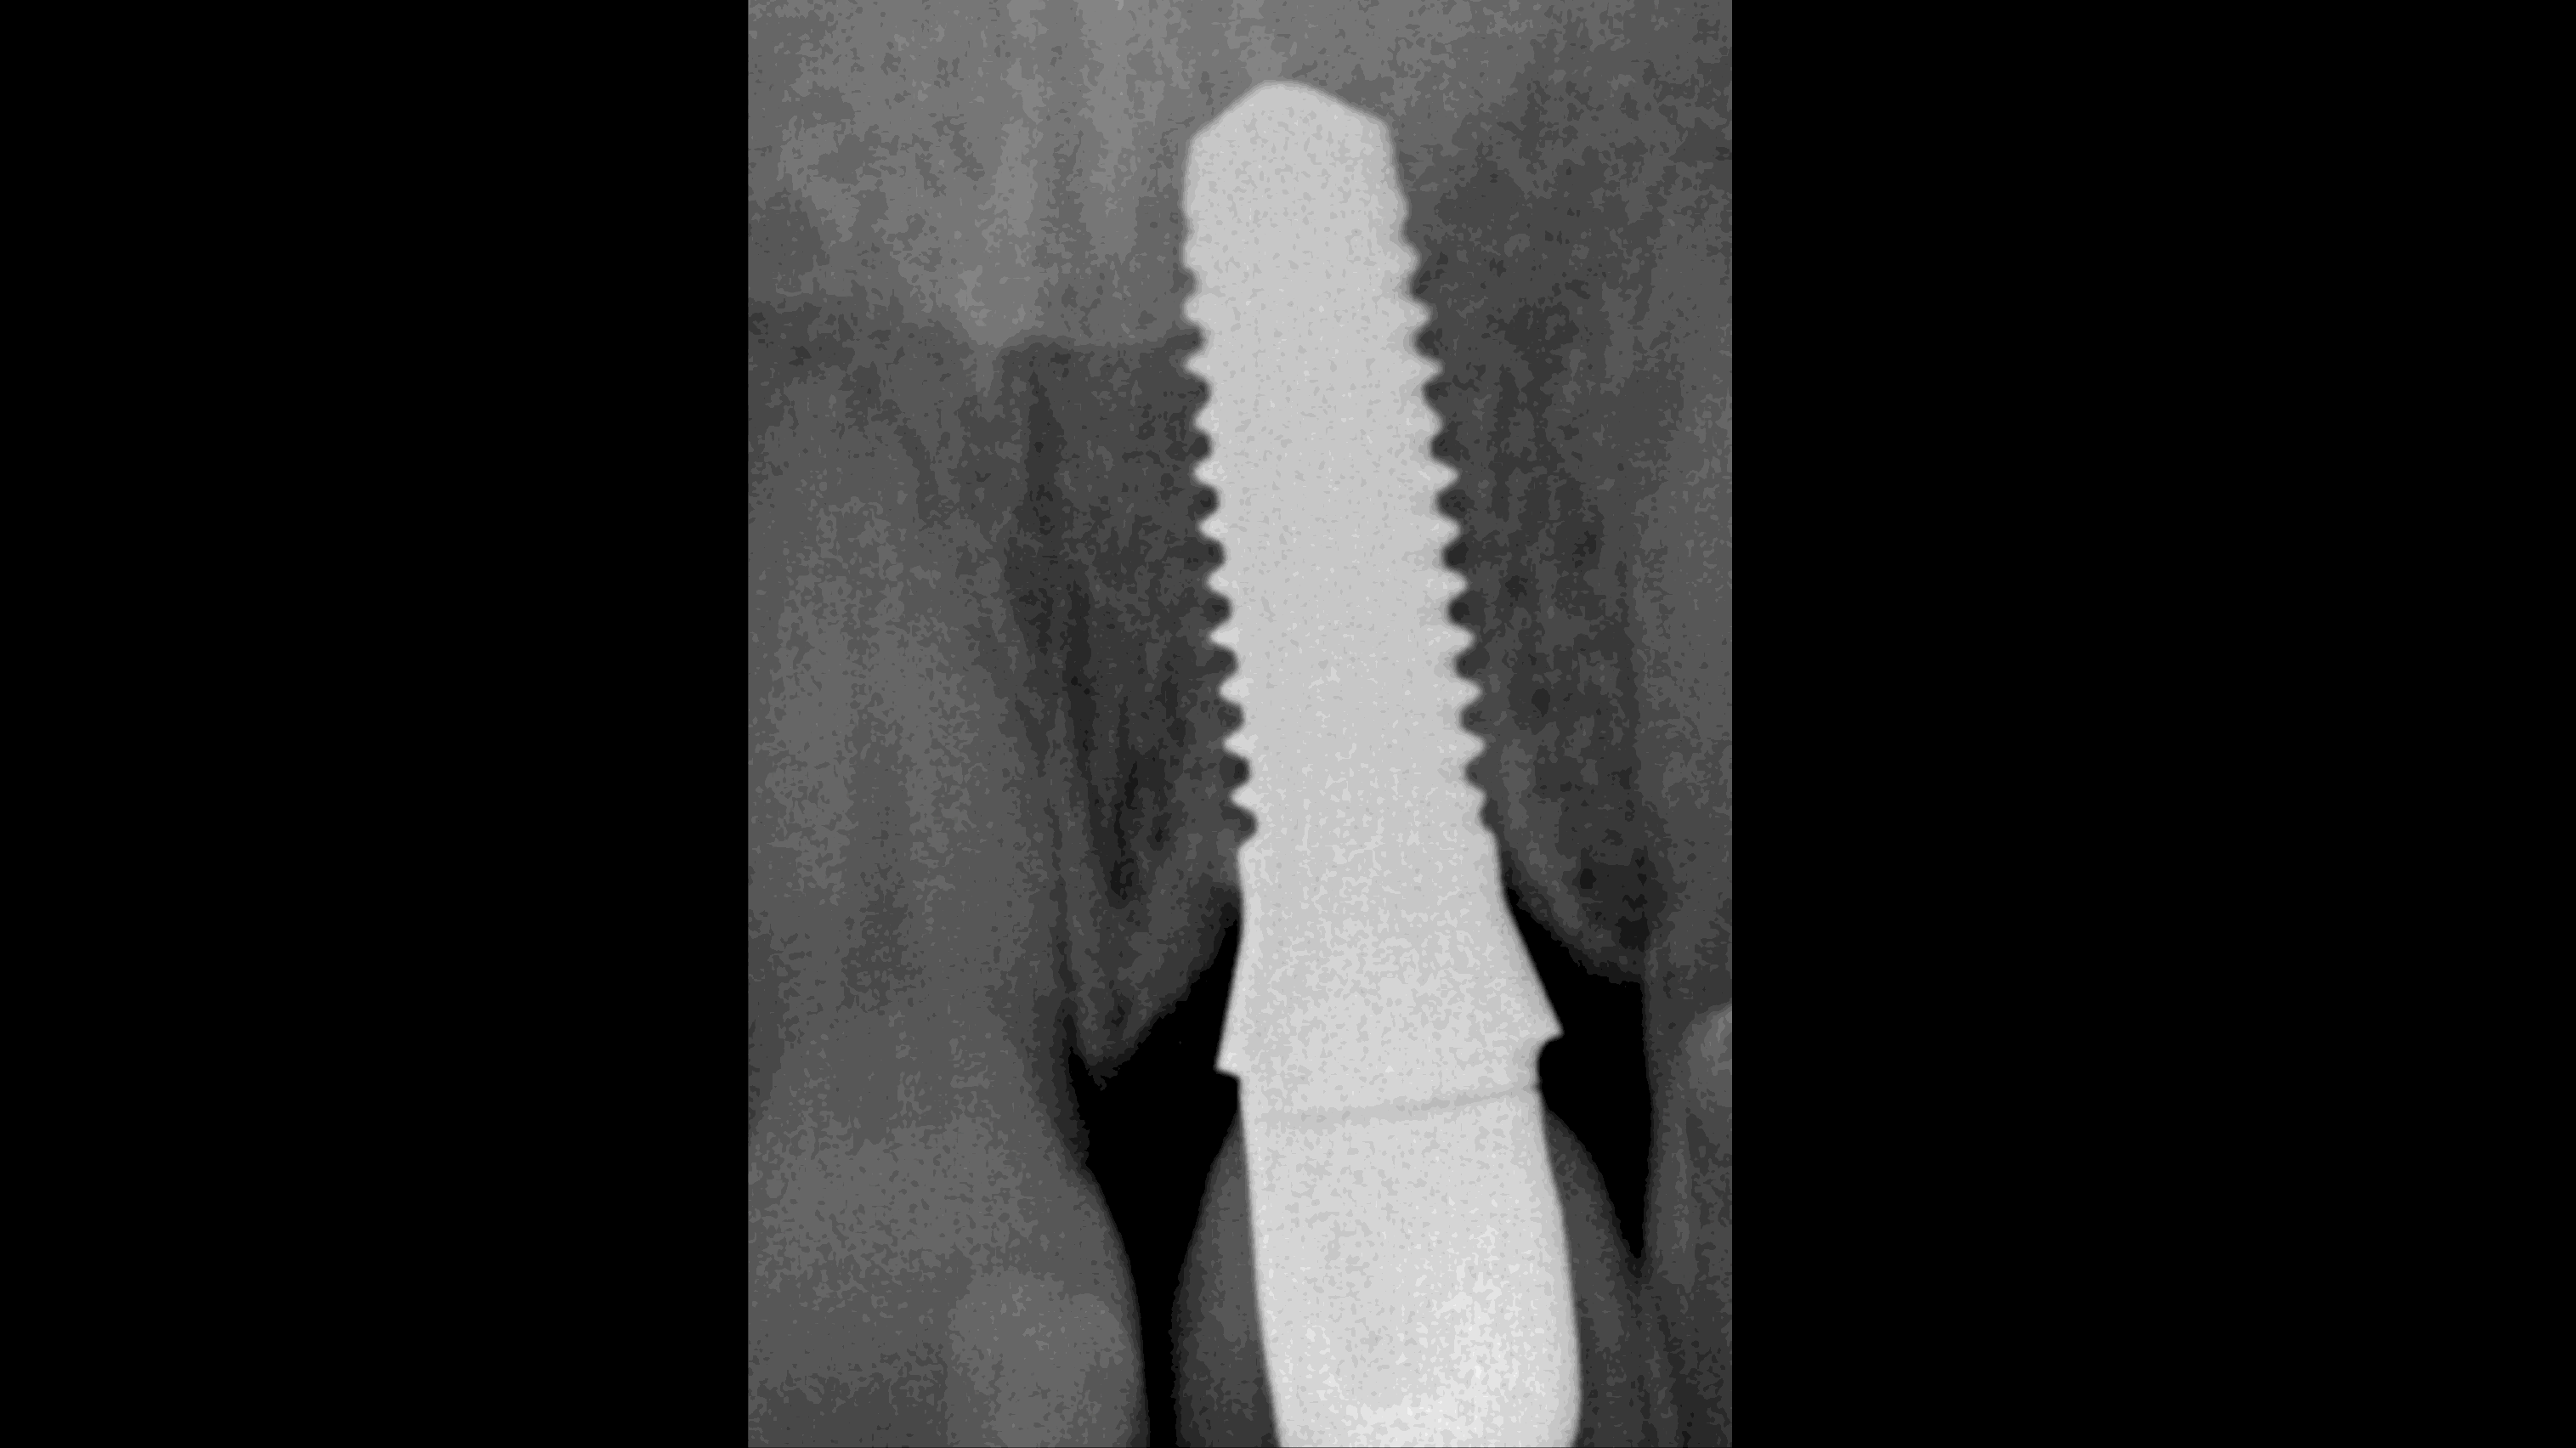
Figure 21:
X-ray five years after finalization
References
Becker J, John G, Becker K, Mainusch S, Diedrichs G, Schwarz F. Clinical performance of two-piece zirconiumimplants in the posterior mandible and maxilla: a prospective cohort study over 2 years.Clin. Oral Impl. Res. 28, 2017, 29–35 doi: 10.1111/clr.12610
Brüll F, van Winkelhoff AJ, CuneMSZirconia dental implants: a clinical, radiographic, and microbiologic evaluation up to 3 years. Int J Oral MaxillofacImplants. 2014 Jul-Aug;29(4):914-20. doi. 10.11607/jomi.3293